Showing posts with label Bags. Show all posts

Tuesday, July 8, 2014

Mondo Bags - Done!

After I made my Q3 FAL list yesterday I hit the sewing machine
and spent the afternoon finishing up these three Mondo bags. 

I decided to use darker fabrics for the lining this time around and it makes the bags look totally different from the other mondo bags I made, which had yellow/orange on the inisde. 

These will be going out to these three wonderful women.
I didn't tell them I was making them for them, so hopefully it will be a nice surprise for them.
I still need to make one more. Next time I head to the beach I'll pick up that last interfacing.
The bag can made without it, but it makes it so much easier having it.

These bags are my first finish for the third quarter of the 2014 Finish along.  
I am glad to have them finished and I am hoping their new owners will love them just as much as I do.

Linked up at Freemotion by the River and Quilt Story's Tuesday link parties.

=^..^=  


Friday, June 27, 2014

Progress on Mondo Bags.

Finally made some progress on my three Mondo Bags. Most of the month of June has been busy with traveling and game playing.  I did sew a few minutes a day, and when I say few I mean one seam a day sometimes.  That makes for some slow progress, but I finally have all the sections sewn together and all the inside fabric cut and ironed onto the fusible fleece.   I have to travel again this weekend so I might not get these done in time to be added as a finish for my second quarter Finish-A-Long. 

I also still need to finish my goal for A lovely year of Finishes too.  Egads, I only have three and half days of the month left. I might not make my June goal for ALYOF.  Ah well, too much playing around in the month of June I suppose. I have been enjoying the summer.


=^..^=

Tuesday, May 27, 2014

Mondo Bags in Progress


After finishing up my Slide Show quilt I went to my Q2 Finish A-Long list to pick a new project to finish up. I decided to go with the Mondo bags.  I have some packages I want to mail out and it would be great to be able to have the Mondo bags ready so they can go in the boxes as well.
Each bag uses 208 squares.  I had most of them already cut so I only had to cut a few charm squares to get the remaining squares I needed for all three bags.  I made some good progress, but finishing them up will have to wait a bit since my machine is shoved in a corner and inaccessible.

I spent yesterday pulling up the old carpet in my sewing room which means the sewing machine has to go on vacation for a bit till things get put back together.  Hubby and I will be laying new floor in the evenings when he gets off work.  It shouldn't take too long... I hope.  :)

=^..^=


Monday, September 30, 2013

Twist to the 60's with Batiks - Blog Hop

Flower Power!!  That is what comes to mind when I think of the 60's.
I wasn't around in the 60's so I don't have any memories of the era, but I can definitely appreciate the music, movies, and art from that time.  The 60's were full of color which makes batik fabrics perfect for this hop.

I stitched together lots of flowers from some of my brightest batik fabrics
and to go along with the flowers I made a few pouches.

The first pouch was made using a technique similar to the cathedral window technique.
You can find the process tutorial at Patchwork Notes and can use any pouch pattern you like.
I found the perfect spinning flower charm at Hobby Lobby and
my daughter lovingly attached it to the zipper with an extra long chain.

I hand sewed my zipper/lining to the front section because I was sure I couldn't line up the stitches on the front without having it look like a disaster.
It took me a little longer, but you can't see the stitches on the front of the pouch and I am digging the small blue hand stitching in the inside.

I used the Clover Kanzashi Flower makers to make all my flowers.
I used two different styles: the small Daisy Petal and the Large Orchid Petal
These tools from Clover are awesome!  I have made these flowers by hand before and now that I have the plastic tools by Clover I will never go back. They make it so much easier and the petals come out perfect every time.  I bought my flower makers at JoAnns when they had them half off.  I will definitely be going back for the other styles!

This next pouch is called Suzy's Sack, the pattern is by This and That and I bought it from Connecting Threads. It only cost $4.50 so it was easy to add to my cart when I ordered some fabric and thread.

The pattern called for 1/2 inch d-rings and a claw clip for the handle, but I couldn't find either of those at Joanns or Hobby Lobby. I will have to look online to find them.  

 The bag is a small and is meant to hang off or inside a larger one, so the clip would be nice.  The pattern also gives instructions if you don't want to use the clips, which is what I did, but it looks like I can alter it easily when I get the clip and D-ring.

Last I made an Ear Bud Pouch from Erin Erickson's tutorial, but this time I used her Heart Shaped Tutorial.

These are for ear buds, but you can put anything small in them.  My daughter uses hers as a coin purse.

I had a great time sewing up all my creations, the flowers in particular. I sewed them up while watching Dr. Who on Hulu, which coincidentally originally aired in the 60's.  


Make sure you check out the other 60's Batik hoppers today.
Click on the links below to see all the goodies for today.


September 30


For a full list of the blog hoppers Visit:


=^..^=


Friday, August 24, 2012

Back to a Schedule and Mondo Bags

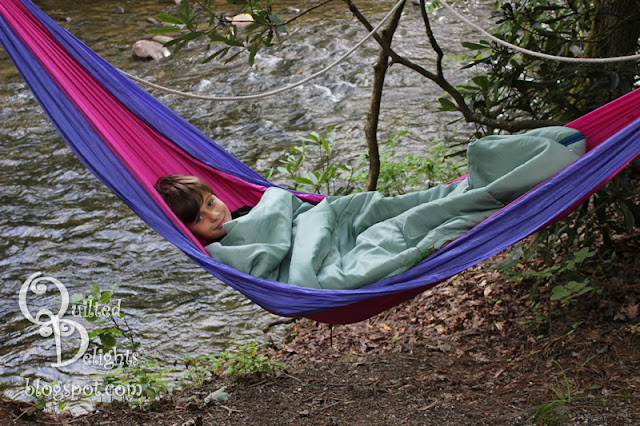
Well, Summer is finally over.  We spent the last week of summer in the mountains of NC camping, tubing down Deep Creek, and visiting with family.  We camped from Sunday to Thursday. There were a total of 32 family and friends at the campsite.  A few went to spend the night in a nearby cabin but they hung out with us during the day.  It was a blast!

 We came home Sunday just in time to start school the next day.


 It was early morning and only two of us were awake when I took this photo.

There were two more tents that you can't see. 


We had a great camp site right next to the creek.

We tubed three days in a row. What a great way to end the summer!

When my family left on Thursday we headed to Asheville to visit my husband's brother.  We had a good time driving around the mountainside in his Mule, looking for deer, and enjoying nature.
There was an awesome view from the top of one of hills.  It was cloudy when I took the picture, but usually you can see all the humps of the mountains on the skyline.

I haven't done much of any sewing since I got back, but I did do some before I left. My mom watched my dogs for me while we were gone and when I dropped them off I also wanted to drop off a Mondo bag for her and my sister, who came with us. I finished them up the day before we all left for NC.
I even personalized them on the inside handles.


I used Batik Strips from Connecting threads to make these two bags.  I bought two different color ways and still have enough squares to make another bag.

I have made three bags total. Here they are all together.  The Mondo bag on the right is the one I made for myself a couple weeks ago. 

Now it is time for me to get back into my regular school year schedule.
I sure will miss the lazy, fun days of summer.

=^..^=


Tuesday, March 6, 2012

Tote and Matching Quilt

My good friend asked me to make a tote bag for her niece who is turning one soon.  She wanted something simple to take toys in and out of and she wanted it to be soft.  She also told me her neice liked Tigger, so this is what I came up with.  It has pink Polk a Dot flannel inside.

I put the name on the bottom right and then felt like the top needed a little something extra to balance it out. So I made a fabric flower
This was the first time I have ever made a flower like this and I am totally in love with it.

When I was done with the tote I had a nice sized piece of fabric leftover. Instead of putting it back on the shelf (and letting it sit for who knows how long till I figured out what to do with it) I decided to add some purple borders and quilt it up. I used the same pink flannel for the back and rolled it around for the binding.


Simple, cute, quick, and usable.

 It is small enough to fold up and put in the tote bag and can be used as a car seat quilt, or a small stroller quilt, or it can even be used as a changing pad if she wants.


This set makes finish #8 for the year.


=^..^=

Monday, May 23, 2011

Side Tracked with The Abbey Bag


I got the new Connecting Threads catalogue in the mail the other day and saw this cute scrap bag kit.  It is The Abbey Bag pattern and uses their new line of sewing themed fabrics.  I thought they looked really cute and ordered myself a kit.  It came in the mail Saturday and I started on it right away.  I finished them both up Sunday afternoon and can't decide which one I like best. I suppose I could keep one at my cutting table and one at the sewing machine.  :)


Very seldom do my two cats sit by each other, they usually prefer opposite couches, but this morning I guess the sun coming in the window and the soft quilt made them both want to relax in the same place.
Jasper and Sheen


=^..^=

Saturday, August 21, 2010

Small Zipper Purse


My daughter has been telling me I have made a bag for everyone but her.  And she is right.  I've made bags for her friends, my friends, myself, my extended family and my extended family's family.  I even made tote bags for my boys to carry their treasures in.  But I still hadn't made one for her.  So for her birthday I surprised her with her very own hand made bag.  She had already picked out the fabrics but she didn't know I was going to make the bag so soon for her.  She was still under the impression she wouldn't get one till she was 30.


The bag she requested had to have a zipper closer and had to be small, but not too small. It took me a while to find a pattern that fit her wants and looked nice.  That is probably why I dragged my feet so long on making her bag.  Then this week the thought hit me to look on Etsy for a pattern.  I figured there should be some pretty bags on there made by individuals, instead of big companies, that would fit what I was looking for.  Sure enough I found the pattern for this bag.  The bag is very cute, but the pattern had a few hard spots that left me wanting to rip my hair out, which is odd for me because I have never had any trouble reading patterns before.   Needless to say, what should have taken 3 hours turned into a 9 hour project.  But the end result was worth it.   My daughter loves it and she has already put all her things in it and taken it to school. So the bag is a success.

Tuesday, December 15, 2009

Finally back at the Machine

Wow,  I didn't realize how much I use my machine until it broke.  Even though I had my old one to sew on, it just wasn't the same.  It made me realize just why I bought the new machine in the first place.  My old machine was one headache after another.  It sure doesn't like to play nice.  So between house remodeling, and my broken machine I spent almost a month away from the sewing table.  But now everything is back to normal - well as normal as can be around here.  My regular machine has been to the doctor and all is well and the house remodeling has slowed down a bit for now so I was finally able to create some things out of my fabric.  Today I can only post one of them. The other few things will have to wait till after Christmas to be posted.  I don't want to spoil any surprises.  :)

One of the things I made after my machine got back from the repair was another Bow Tucks Bag.  I just love this pattern, and I love the way this bag feels.  It is so nice and thick.  I used pelon fusible fleece as the instructions say - "it is the best", and boy is it right.  From now on I only want to make bags with is this wonderful stuff.  It makes nice stiff handles and a wonderfully soft bag.  This particular bag was made for a special client who told me to pick what ever fabrics I think looked good.  So I went shopping in my own fabric stash and that in itself was fun.  :)

Friday, August 14, 2009

Another Bow Tucks - But Smaller

My daughter was invited to another Birthday party. This one is an overnight party down at the beach. She is very excited to go. But we didn't have a present, and when I kept asking her what she wanted to get her friend she said she didn't know. I suggested last night that she make her friend a necklace with her beading materials. She didn't seem excited about that. She did like my Bow Tucks bag though and kept telling me she wanted one like it but smaller, so this morning when we still didn't have a present, I asked her if she wanted me to make her friend one. She smiled and said yes but wanted to know if I could put her friend's initial on it. I told her that would be easy and I got to work. I also told her to start making her friend a necklace in case I didn't get the bag done in time.


I started at 9am this morning and spent the first 30 minutes trying to figure out how to make my regular pattern into a smaller size version. There is a mini bow tucks pattern, but I didn't have time to order that and wait a week for it to arrive, so I had to come up with the dimensions on my own.


By 1:20pm I had the bag finished, photographed, and wrapped. Her friend came to pick her up at 2pm so I had finished just in time to relax a bit before they got here.

For this version, I tried a contrasting pocket for the front. I'm not sure I like it. It is the same color as the center of the flowers on the top fabric, but it just seems to stick out way more than I wanted it to. I am also not liking the green. It is the same color as the tiny leaves, but it seems too bright now that it is all together.

My daughter says it is great though and she loves it. I sure hope her friend likes it too. I had my daughter model the bag for my camera. Her and her friend both have the same first name. So this bag could actually be for her too. :)

Wednesday, August 12, 2009

Bow Tucks Bag

This is my newest creation. I saw this bag last October at my guilds "Make it, Bake it, Sew it, Grow it Auction". It was a fun activity where we all bring something we have either made, sewn, grown, or baked and we have our own little auction to raise money for our guild. Up for auction was this purse, but in different fabrics. I bid, but unfortunately I didn't win. It went for more than my budget would allow at the time. But I asked the person who donated it what pattern it was and she told me it was the Bow Tucks Tote pattern. Well I got a hold of the pattern in February and finally just had the chance to make it. The fabrics I chose are some of my favorites in my whole stash. I have been looking at them for months not wanting to cut into them because they are so pretty, but now that I cut into them I realize I can carry my favorite fabrics around with me where ever I go. :) I really like this bag and it was the first time I used fusible fleece for a bag, and I must say I love it! If possible I plan to use fusible fleece in all my future bags.

I still need a button for this bag though. I don't have one in my button collection that fits the bag. You can see in the photo the button loop but no button to hook onto. So I am on a hunt for the perfect button....

******

Here is a photo of the inside of the bag per request. For the sturdy part at the bottom, I cut up my old cutting mat and covered it with matching fabric. I hated to throw out the old mat when I bought a new replacement for it, but I wasn't sure what to do with it. It turns out cutting it into bottoms for bags is the perfect way to salvage it.

Friday, July 17, 2009

Drawstring Bag

My daughter was invited to a birthday slumber party tonight. I didn't really want to go out to the store and just buy a quick gift. I always have hard time picking out a gift at the store when I don't really know what the person wants. That is probably why I like to create most of the gifts I give away. Most of the people I know always enjoy quilts and bags. :) This gift was no exception. But this time my daughter wanted to help in the creation. We decided to make her friend a drawstring bag with her name on it.

Here is my daughter posing with the present for her friend.


I got my pattern from the drawstring bag pattern that was recently posted at Moda Bake Shop. I had my daughter pick out the 5 inch squares from my scrap bin and had her put them in the order she wanted. Then I sewed them together. I had her do the ironing though.


When we were done making it, she kept telling me the strings were too long. I kept saying, "Are you sure?" So she posed for me so I could see how long the drawstrings really were. After seeing the picture to the left, I trimmed the drawstrings right up to the edge of the bag which made a big difference. That is my puppy Dean in the background in the above photo. He is 8 months old now.

I did end up changing the pattern from the website a bit. Since I wanted to embroider a name on it, I made the second to last row a solid color, and I also added a lining. I wasn't sure how much this bag was going to be used, but if it did get a lot wear, I wanted it to be sturdier and I felt the lining would help protect the seams on all the charm squares.