Monday, October 25, 2021

Halloween Chevron Quilts


I am happy to say I finished these two quilts in time for Halloween! 
They did not get stuck in the UFO pile. Yay! 

There were some spooky decorations downtown to take some photos with!
Where do you even find a spider this big?!


They make a nice couple sitting on the bench together. 


I made this top first...


And this one second.


The backings were made in the opposite order.


I was going to use this back with the first top I made, but after I sewed it together, I felt this back needed a little more green in its top, so I made the second top just for this backing.


Then I pieced this backing for the first top.  It fits a lot better with the orange and black top.


When piecing my backings, I find one print in my stash that is long enough to stretch the length of the quilt, then I cut it in half right down the center, or sometimes a little off center.


I fill in the middle with different strips.  The width of  the quilt will determine the size of the strips and how many strips will go in the middle.  These two quilts are small, so only had to cover about ten extra inches.  For this one, two 2 inch black strips and a 6 inch orange strip for the center fit nicely.


This Hobbs Black batting was fun to use.  It is always strange butting black batting on the machine at first since I don't use it as often, but I must say, it made it even spookier when quilting it up and when I was adding the binding. It was fun to see black peaking out instead of white. 

I quilted them both quilts the same way,  wavy zig zag lines that followed the zigs and zags.
Was easier and quicker than trying to do straight lines and keep them straight.


I'll be taking one of these to the family Halloween party. Who ever wins the the Halloween Party games I have planned will win the quilt!

At the family Fourth of July party this summer I brought a jar full of red, white, and blue M&Ms.  Who ever guessed the closest to the number of M&Ms in the jar won a 4th of July Quilt.  

Later on at the party, I was thinking it would be fun to have a challenge at each family get together and give a quilt away.  I wasn't the only one thinking it either,  my brother-in-law mentioned it would be a fun tradition for someone to win a quilt at each party.  He suggested "feats of strength" for the next get together, but I think I might go for something more like "minute to win it" this time around.


Happy Haunting!

=^..^=


Tuesday, October 19, 2021

Ghastly Ghouls Blog Hop


Welcome to day two of the Ghastly Ghouls Blog.  Thanks to Carol of Just Let Me Quilt for hosting!
I love playing along with the Halloween Hop each year.


This year I knew my October would be super busy but I still wanted to play along and create something fun for Halloween and use up some of the good Halloween prints I have, so I decided to go with a quick quilt pattern, and one I have made before:  The Chevron quilt aka Zig Zag Quilt.


  The top was super fast to put together and I had plenty of orange and black Halloween prints to choose from.  From fabric selection to the last row stitched together, I had the top together in about 4 1/2 hours.  

There are two really good tutorials on the internet you can use if you want to make your own.

and 


When the top was done I picked out some spooky fabric for the back: some cute bats with a hint of green in the moon light.  With the back done I knew the quilting would only take a few more hours and I could have a nice quick project done in a weekend.


But I kept staring at the newly pieced back and decided it wasn't the right fit for the black and orange top.  I felt like it would go better with a different color version of chevrons.


So instead of loading this on the machine to quilt the top I just made, I picked out another batch of fabrics for a new top that blends better with the my newly pieced backing.


Something with a few more greens and a touch of orange.
I'll be cutting these out tonight!

Who makes a backing first and then picks fabrics for the top??  Me I guess.  Haha!

Be sure to check out the other hoppers today and see their Ghastly Ghouly projects.


Happy Haunting...er Quilting!!


=^..^=


Thursday, September 30, 2021

Island Batik and byAnnie Round Trip Duffle Bag


Island Batik Ambassadors have been busy making bags this month with patterns, notions, and hardware supplied from byAnnie com.


And of course using lovely fabric supplied from Island Batik. For this challenge we got to pick the bag pattern and fabrics we wanted to play with.


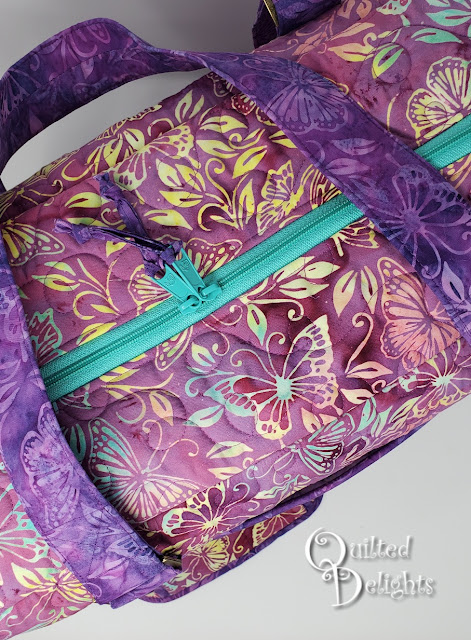
 I chose the Round Trip Duffle Pattern and fabrics from the new Butterfly Blooms fabric line by Kathy Engle hitting stores now.


I had the perfect person in mind for this bag and her favorite color is purple so I went for a couple different shades.  


The fabric for the lining of the bag comes from the Island Batik Foundations line and is called Bubbles in Periwinkle.  The bottom cream fabric is housing an acrylic stabilizer which was also provided from byAnnie.com.  This helps keep the bottom of the bag nice and firm.


Annie provided the turquoise zippers which pop against the butterfly print.


I originally picked four different Aurifil threads for the bag, but ended up using only three. A darker turquoise thread turned out fantastic as top stitching on the cream contrasting fabric and the lining fabric, so I saved the yellow for another project.


I usually don't get a photo of the needles, but I wanted to show them off for sure this time around. These Schmetz Microtex needles handled all these layers with no problem.


I really enjoyed making each part of the bag from start to finish. It was fun to see the little pieces come together. And that Soft and Stable interfacing is some fun stuff. Perfect for bag making.  I made the carrying strap and pad first and was super excited how it turned out and the rest of the bag was just as fun, watching it grow from piece to piece. 


And here are more photos taken outside just because I liked the bag so much I took a lot of photos.


Front


Side


Back


Inside


Cats 


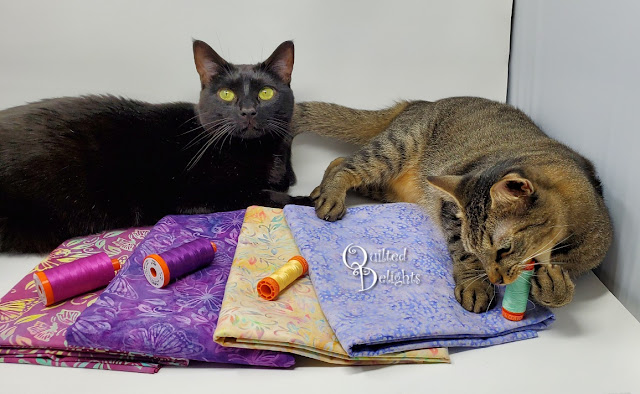
When I got the light box out to take pictures of the fabric the cats thought I got them out a new play place.


It was a bit of a struggle to get a photo. The thread was just too much fun for them.


And they were just too cute to kick out of the box.


But eventually they had to go because I needed a photo.


Happy Quilting!


=^..^=

Friday, September 24, 2021

Falling for You Blog Hop


Welcome to my stop on the "I'm Falling for You" blog hop hosted by Joan of Moose Stash Quilting.

I have two projects to show off today.  The first project is a UFO I started when I joined the "Leafs Me Happy" blog hop oh so long ago in October of 2012. I have been putting this project on my Finish-A-Long lists for years and finally sewed the last stitch just in time for this hop!  Yay!

The pattern is a combination of two elements.  
Bonnie Hunter's Spider Blocks and a pieced maple leaf block I found here.
The leaf pattern is for a 15.5 inch block, so I had to re-size it to fit in an 8.5 inch square.


I did some custom quilting on this one.  Playing around with my rulers, ribbon candy, leaves, and feathers.


I love how the sun really shows off the quilting.


I am so excited to have this one finished!.  It will be gracing my couch this Fall season.


Next up is another old project... sort of.  A couple years before I started the project above, I bought three fall themed charm packs with the intention of making the Charming Stars quilt by Stefanie of  Little Lady Patchwork.  Well last week I finally opened up those charm packs!  Wahoo!  


This quilt went together super fast! These are big blocks with big pieces.  


After I cut up the white background fabric I zipped out those star corners lickety split. 


I didn't even spend hours trying not to get another print next to another print, I just put them on the design wall and let it go!


When I bought the charm packs I also bought a half yard of brown in the same fabric line, just in case.  Good thing,  it turned out perfect for the binding!


I did some all over leaf meandering for the quilting in a pastel yellow thread.  It matched perfect with the browns and oranges and didn't stand out too bright on the white.


The quilt is super soft and fluffy With the looser quilting.


I am loving this fabric and this pattern!  Yay for finally getting the fabric off the shelf and into a quilt!


I really enjoy playing along in these hops.  They really help me use up all the wonderful fabric I've pick up over the years. Not sure if I am quilter or more a fabric collector.  Haha!


I did another stripped backing for this one.  A lot of my fabric stash is two yard cuts or less.  That usually gets me the length of a quilt but not wide enough, so I slice it down the center and add smaller strips in the middle to fill it out out.

Great way to use stash up and add extra color and fun on the back.


Check out this fun brownish egg-ish fabric I used for the back.  I love it!


So there you have it...  One quilt 9 years in the making and the other quilt finished in week after I finally opened those charm packs I bought oh so long ago ago!

Check the links below to see all the other Fall inspired projects today from my fellow hoppers!


Saturday, September 4, 2021

Curved Sticks - Fabric Requirements and Pattern


I had a couple people request the fabric requirements for my last Island Batik Ambassador quilt, Curved Sticks, so I put together a simple pattern. Click on the image above for a link to the PDF file.


The is a free pattern to help make the quilt. It assumes the reader knows basic quilt construction and is familiar with creating their own Half Square Triangles and how to use tools to create Triangles in a square.

If you see any errors please let me know.


Happy Quilting


=^..^=