Tuesday, June 22, 2021

Unicorn One Block Wonder - Fairy Tale Blog Hop


Welcome to day two of the Fairy Tales Blog Hop hosted by Joan of Moose Stash Quilting.

Hopefully you are not sick of seeing One Block Wonders, this is my third post in a row with them, but I couldn't resist sewing this panel up for this hop.  Unicorns with beautiful colors and a castle glowing in the background... all kind of fairy tale goodness going on here.  


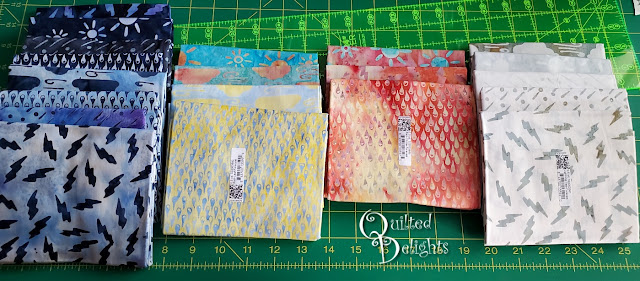
I got tired of flipping the ruler back and forth cutting one strip at a time into triangles, so I laid out all my strips and cut them one way then turned the ruler and went back and cut them all the other way.
Made it a wee bit quicker.


I saved the edges of each strip and sewed those together to create even more triangles.  


I had over 200 hexagons with the extras I pieced together.  I used all but one and a half.


I am loving the colors in some of these blocks!


They didn't all fit on the design board.  Had to squeeze everything in.


I love pressing the seams open.  Some people press them all one way and then swirl the center, which works too, but I really love this look!


So many fun hexagons in this one.  The panel was a wide one, a full 36 inches. 
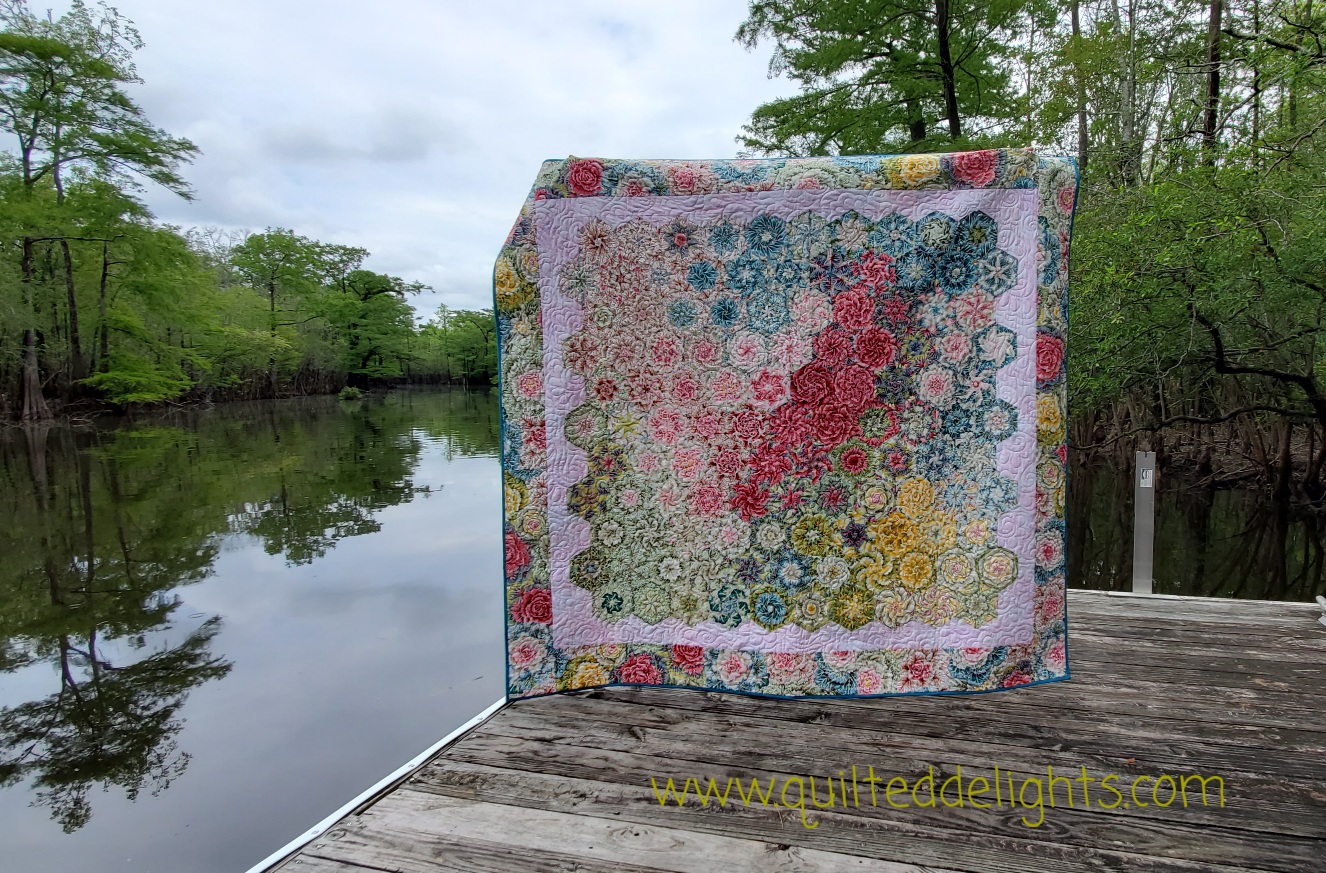
I cut my strips at 3.25 inches.  With everything sewn together the top measures approximately 85 x 83 inches.  It's a biggie!


Check out the back with all those open seams!  Super cool. 
Next up for this one is to pick out some backing and get it quilted!


Make sure to keep hopping to see all the wonderful Fairy Tale inspiration today!


Saturday, June 19, 2021

Cabbage One Block Wonder

 Another UFO off my list! Yay! 
I started this one in November of 2017 and finished at the beginning of June.


Several reasons kept this one a UFO for a while.  Of course I made other quilts in between for other people or occasions, but the first delay in this one was when I cut a whole in one of my triangles as I was trimming dog ears off one of my hexagons.... frustrated with that, it sat while I tried to figure out what to do to fix it.


The I realized I could fussy cut the same triangle out of the left over yardage I had.  So did that and it was on it's way to completion...  until it was time to pick the layout.


Picking the layout for this one took a while.  I couldn't find something I was really happy with. I went through several different versions letting them each sit on the design wall a couple days to see if I liked them.  I tried random all over, a swirly heart shaped heart with the pinks, a swoosh of yellow...


And finally settled on pink coming from the top left corner going to the center.  But I was one block short.  So it sat.  I tried cutting out a big hexagon from the print, but that didn't look right.  Then I saw  a tip online to use the left over edge pieces from the cut original strips and sew them together to make more triangles.  I did that and had my last hexagon.


Now that the layout chosen, I needed the perfect inner border fabric.


I took one of my half hexies with me to several quilt shops, but couldn't find anything that I liked.  So it the sat...


After several months, I finally found the perfect pink and white print online and ordered it.  I was back in business.  Until...


I couldn't find that half hexagon swatch I took to the store!  I looked everywhere: in my purse several times, all over the sewing room, every room in the house, all my jacket pockets, and in the car, but it was no where to be found.  I really didn't' know what to do now... so it sat.


I thought, maybe I will just leave it out. It was on the edge of the quilt, so it wouldn't draw too much attention, but deep down inside I wanted to have a full hexagon.  I had already convinced myself I didn't have enough yardage to fussy cut three more triangles, but decided to see if I could get at least one original triangle and two somewhat similar. When I finally pulled out my left over yardage, I found had enough to get three full triangles!  I was excited and could have kicked myself for not pulling out the original fabric sooner.  


I made that last half hexagon and didn't stop till this one was finished. I got the inner border sewed on and added the last of the original fabric for the outer border.


I had this lovely floral print in my stash with almost all the same colors of the cabbage fabric, just a little brighter, so it went on the back with some pink, green, and yellow.


I like the back just as much as the front, so bright and fun!


I am glad to call this one finished!  Now on to the next one!


Happy Quilting.

=^..^=


Wednesday, May 19, 2021

Born to be Wild Blog Hop


Hey everyone! Thanks for joining me for day three of the Born to be Wild Blog Hop hosted by Carol of Just Let Me Quilt. Today I am showing off my Leopard One Block Wonder Quilt.  I showed this quilt to my daughter as I was in the process of making it. The first thing out of her mouth was, "Dibbs!"  So this one will be going to her.


I love playing along with these blog hops, they get me inspired to create something new or finish up something old.  This project falls into both categories: a new project that has been waiting for me to cut into.  I saw these leopard panels on sale for $4.50 in the fall of 2018 and couldn't pass that up, but they always got put on the back burner for other projects.


This hop got them out of the bin and into a finished quilt.


You need 7 panels to make a One Block Wonder like this: 6 to cut cut up and one to show off.  


That comes to $31.50 of fabric for this quilt top.  That's a pretty good price!


 This is the final layout on my design wall before the rows were sewn and before I added the blue background.  


Used up some of my older fabric for the backing.  Great way to bust the stash is with pieced backings.


Halfway through I had a quality inspection done by my own "wild" animals.


Eh, they aren't so wild... and they love each other.


I love making One Block Wonders, they turn out different every time.
This is the 6th one I have made and there are more in the works.


Make sure to visit the other Blog Hoppers today to see what wild creations they have made.


May 17th


=^..^=

Tuesday, May 4, 2021

Island Batik Quilt Modern Blog Hop


Welcome to day two of the Island Batik Quilt Modern Blog Hop. 


Today I get to show off my Mountain Rain quilt I made with the new Island Batik fabric line called Forecast by Ebony Love of Love Bug Studios. It should be hitting shops this month! 


When I got this stack of weather themed prints all I could think of was rain on mountains, so I drew an abstract a pattern and sewed it up. 


Good old graph paper for the win!


I wanted two different kinds of rain. Diamond rain and long straight rain.


For the diamonds, I used the Diamond Recs tool by Studio 180 Designs.
I really like this tool. It cuts the center diamond perfect and the outer edges just a wee bit bigger than needed and then you trim it down to a perfect rectangle. 


The mountains and the clouds were improve paper piecing, sort of. I drew the shapes right then on paper then sewed them out. There was definitely some improve piecing in between the rain and the mountains to get everything to come together. That should qualify as modern, right? I hope so. Either way, it was a fun project to work on and I used every fabric in the Forecast bundle for this quilt.


This one was quilted with Hobbs Premium Polyester. batting  I quilted all over wavy lines and it tuned out so soft and fluffy.


I used White Aurifil Thread for the quilting on this one. Since the dark prints also have some light in them the white blended perfectly.


And of course I used a Schmetz needle. They always have the perfect needle for my projects.


Make sure to check out my fellow Island Batik Ambassadors Joan Hart of Unicornharts to see what she created with Forecast.


Happy Sewing! And May the 4th be with you!!


=^..^=

Sunday, April 25, 2021

Three Zipper Pouches


A quick finish,  three zipper pouches.


After I was done making my Island Batik Bargello placemats in January I had this small strip piece left over and wanted to use it up.  It was about 21 inches long. I figured I could cut it down and get two zipper pouches out of it. 


There are lots of cute zipper pouch tutorials on the web, but I used the one by Jedi Craft Girl. I like the way she adds the zippers with fabric on the ends.


I did alter her dimensions a bit though to fit my 21 inch strip. Her tutorial calls for a 9 x 6.5 inch piece for the outer fabric, I cut mine 9.5 x 5.25 to use up the whole strip without any leftovers.


I had to cut three strips off each section to get to 9.5 inches wide. That left me with 4 little sections of three inch strips.  I realized if I combined them I could have two more front sections with six strips each.

So I sewed those together and got enough sets to make three pouches.


They turned out a little shorter than most pouches since I altered the height by over an inch, but they are perfect size for colored pencils or make up.

I added a little pull tab on two of them. After I sewed the first one without it I felt they needed one.


I added some cute charms on the zippers for fun.


These were quick to sew up and used leftovers that normally sit for years waiting to be turned into something else.


It was also nice to work on a quick finish in between some of my larger quilt projects. 


=^..^=