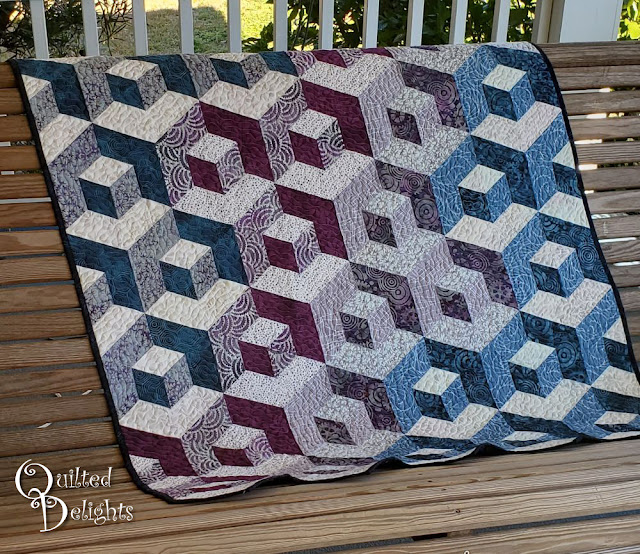
The Island Batik Ambassador challenge for December is to explore the world of 3D. We could use any method to make our quilts pop into life!
I went with with color play and regular piecing to create 3D cubes.
I have made two of these in the past for mini quilt swaps and they are easier than they look to put together. The other two I made were small versions and done in rainbow colors. This is my first big version done in similar colors and I am loving it!
This quilt does not have any Y seams that is one of the reasons it goes together so quick and easy. If you want to make one, the hardest part is probably choosing the different shades of fabrics to use. Once that is done, it's straight line sewing to create triangles and half hexagons.
To make one, each cube needs three shades of fabric: a light, medium, and a dark. I used 12 fat quarters from the Island Batik collection Steam Engine by Kathy Engle for Studio 180 Designs. These came in my second Ambassador box. I love these purples and blues. If you love them too you can pick some up in shops right now!
When picking out colors, make sure each shade has enough contrast compared to its counterpart. If the light and dark or dark and medium are too close they will blend together and from a distance the quilt will look more like flat diamonds instead of 3D cubes. The light and medium set in the top left of the photo was cutting it close, but when I laid them out and tested them, I could still see the 3D cubes so I went with it.
To make the quilt I started with 2 1/2 inch strips to cut my triangle and half hexafon pieces.
To make one cube you need 2 half hexagons and 2 triangles from each of the three colorways. I used the Hex N More Ruler from Jaybird Quilts to cut mine out, but you can use any tool that will help you cut half hexagons and 60 degree triangles from a strip.
To create the two toned triangles, take a half hexagon and pair it with a triangle from one of the other tones and sew them together. For example, If I start with the two light half hexagons, I will sew a medium triangle on one and a dark triangle on the other. This step goes pretty quick if you string piece them all together.
Sew all the light half hexagons and then go on to the medium half hexagons adding triangles to those and then finish up with the dark half hexagons.
Take the six triangles and lay them out into a hexagon making sure the lights and mediums and darks touch. I pick which way I want the shadow to face and then lay out the triangles that way.
Only sew half of that hexagon together. This way prevents having to sew Y seams. This method is just like creating a One Block Wonder quilt, if you have ever done those.
I sew two triangles together then add the third one.
Again, only sew half the Hexagons, do not sew the two halves together.
Once all the halves are sewn, lay out all the cubes to whatever design you like. I added some side half hexagons to fill out the sides in my version.
Sew the half hexagons together by rows based on the layout. Once all the rows are done, sew those together to make the top. This part is easy sewing but gets a little time consuming to pin and match all the points to make sure everything lines up right.
I used Hobbs Tuscany Cotton Wool batting. It quilted up fantastic!
I enjoyed slowing down with this quilt and enjoyed the process, watching each block and row come together to create the 3D illusion.
This is also my fourth finish for the final quarter of the 2019 Finish-A-Long.
You can see my whole ambitious list here.
=^..^=

