

I really was not excited about the triangle quilt at first, so I did drag my feet a bit, but as time passed and progress went extremely slow, I decided I needed to put a deadline on this so it would get done. I picked my son's birthday.

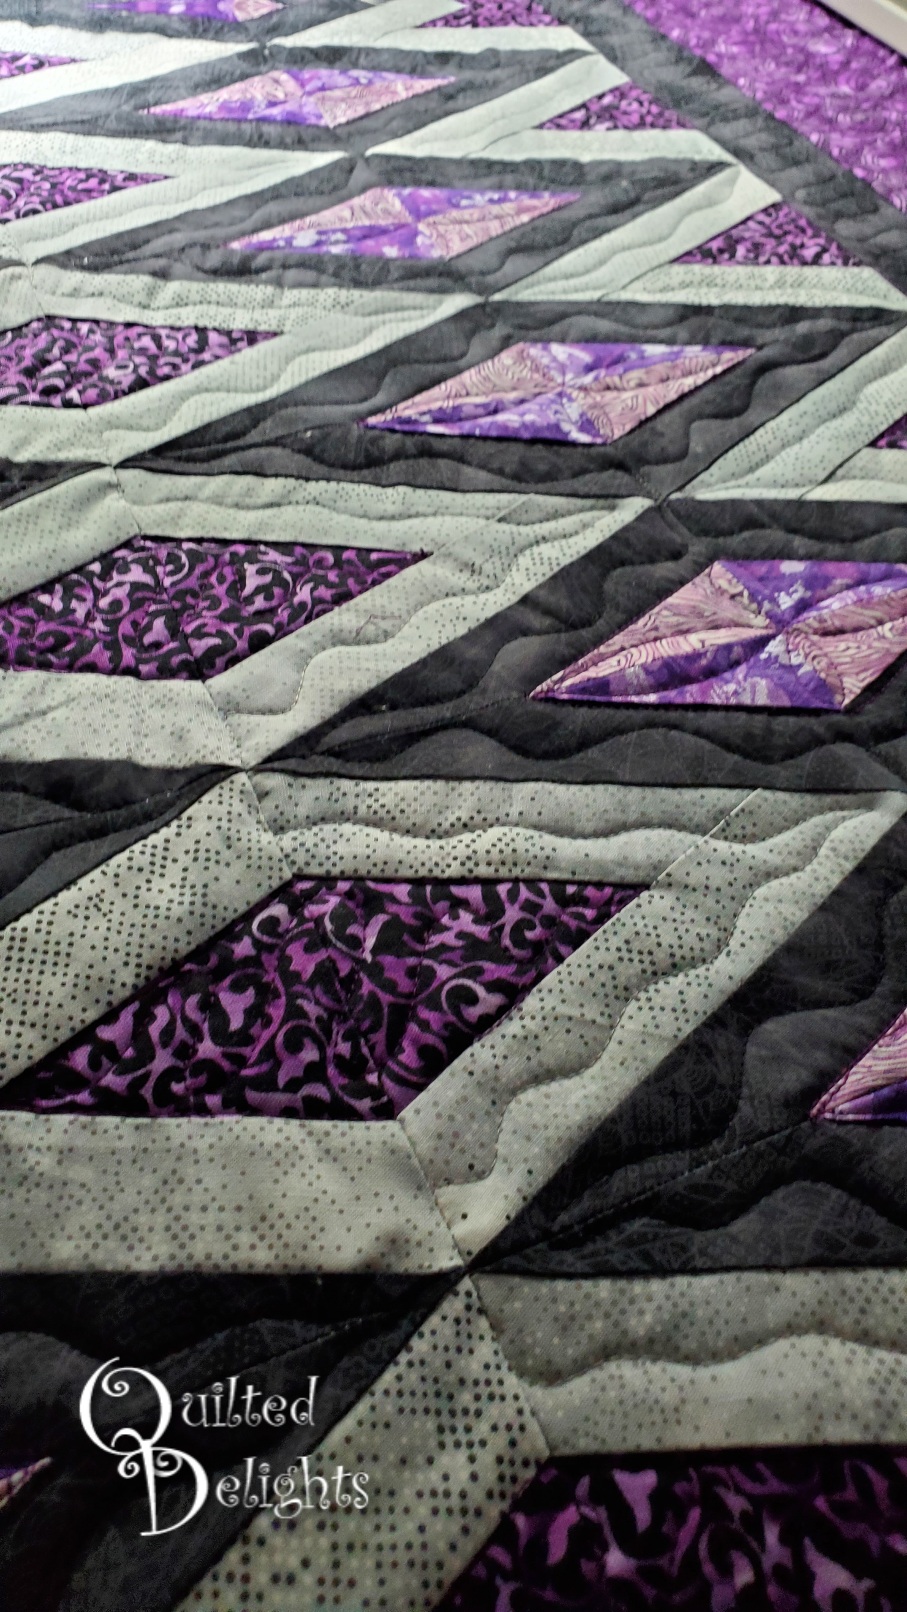
I started out making a diagram in EQ8. I had to make the triangle wide enough but also make sure it didn't get ridiculously long.

I came up with this rectangle paper pieced block. It is just a wee bit longer than it is wide so it makes the length I wanted without getting super wide. It also allowed me to create the triangle shape for the quilt by only sewing half the block for the edges.

I also used this same block for my Island Batik Ambassador Project in January. You can see that here.

The original design did not have a border, but my son said he wanted one, so I played around with colors and we ended up with a black inner border and a purple outer border. This made the quilted even larger.
Boonky decided to help pick out borders too.

I was really concerned about how I could create a triangle back without wasting so much fabric and how to pin it to the quilting frame.

I had the perfect fabric for the back, more triangles, but it wasn't long enough. It didn't go all the way down to the end of the triangle. Luckily since the top was a triangle I could cut off the triangle shaped edges of the backing that stuck out from the top and sew those together to create another triangle. I was able to sew that to what I already had and got the length I needed for the whole back.

Now I had to figure out how to attach a triangle shaped back to the quilt frame. I decided to sew some muslin triangles edges halfway down, just enough to get something to pin the the end of the machine. It worked out pretty good even though there were some holes in it, and it needed some pins.
The backing rolled up just fine on the frame and I didn't have any issues quilting it.

I did some quick wavy line quilting and added the binding just in time for my son's birthday.

My son did know I was working on the quilt for several months, but he had no clue it was even close to being finished. I kept its progress hidden under other projects and when ever he would ask about it, I would tell him I was still working on it and that maybe, just maybe, it would be done in time for Christmas,
The last few days I thought for sure he would come in the sewing room while I was quilting it and see it on the frame. I did the quilting early in the morning while he was sleeping, but I needed two mornings to quilt it. So it sat on the frame all day with the door closed. I stayed out of the sewing room that whole day while he was awake. Luckily he didn't go in there so so the surprise on his face when he opened it on his birthday was fantastic!.

The look on his face is priceless! Good job 👏
ReplyDeleteWell Done there Proud Momma!! His smiles, say it all!! Now, we all want to see it on the bed, for the final phase of fulfilling his desires. (Are you now dreading what his next request might be? :))
ReplyDelete