Saturday, January 21, 2023

Pink Tint - Project Quilting 14.2


The theme for week two of Project Quilting is Pink Tint.  Some shade of pink was supposed to dominate the project.  I think I got that covered!


In my most recent Island Batik Ambassador box, I ended up getting a precut that was perfect for this project.  Strip sets dedicated to the color pink!  Come back Monday to see all the other goodies in my box when I post a little video of the Island Batik fabrics I get to work with this year.

These are pink gradients from the Island Batik Foundation Prints.  You can get these all the time and can always find one that matches well with their new fabrics lines coming out.


The idea for this project came from a similar project I am working on.  This one is just a smaller version.  My other one was sewing up so fast, I knew I could knock out a smaller version in a week for sure!  


Bargello quilts are super quick to make, they look way more difficult than they really are. 
First you sew all your strips together in one big tube...


Then you cut various size strips from the tube.  That is if your cat will let you.


This is Carl,  he decided these pinks were the perfect place to lounge.


After I got Carl to move, I cut out all the strips and stacked them in order.  I only used half the strip pack for this quilt.  Which means you can get two small quilts from one strip pack!  


I cut the borders from my Island Batik Yardage.


The piecing was so quick, I had time this week to do some free motion quilting. 
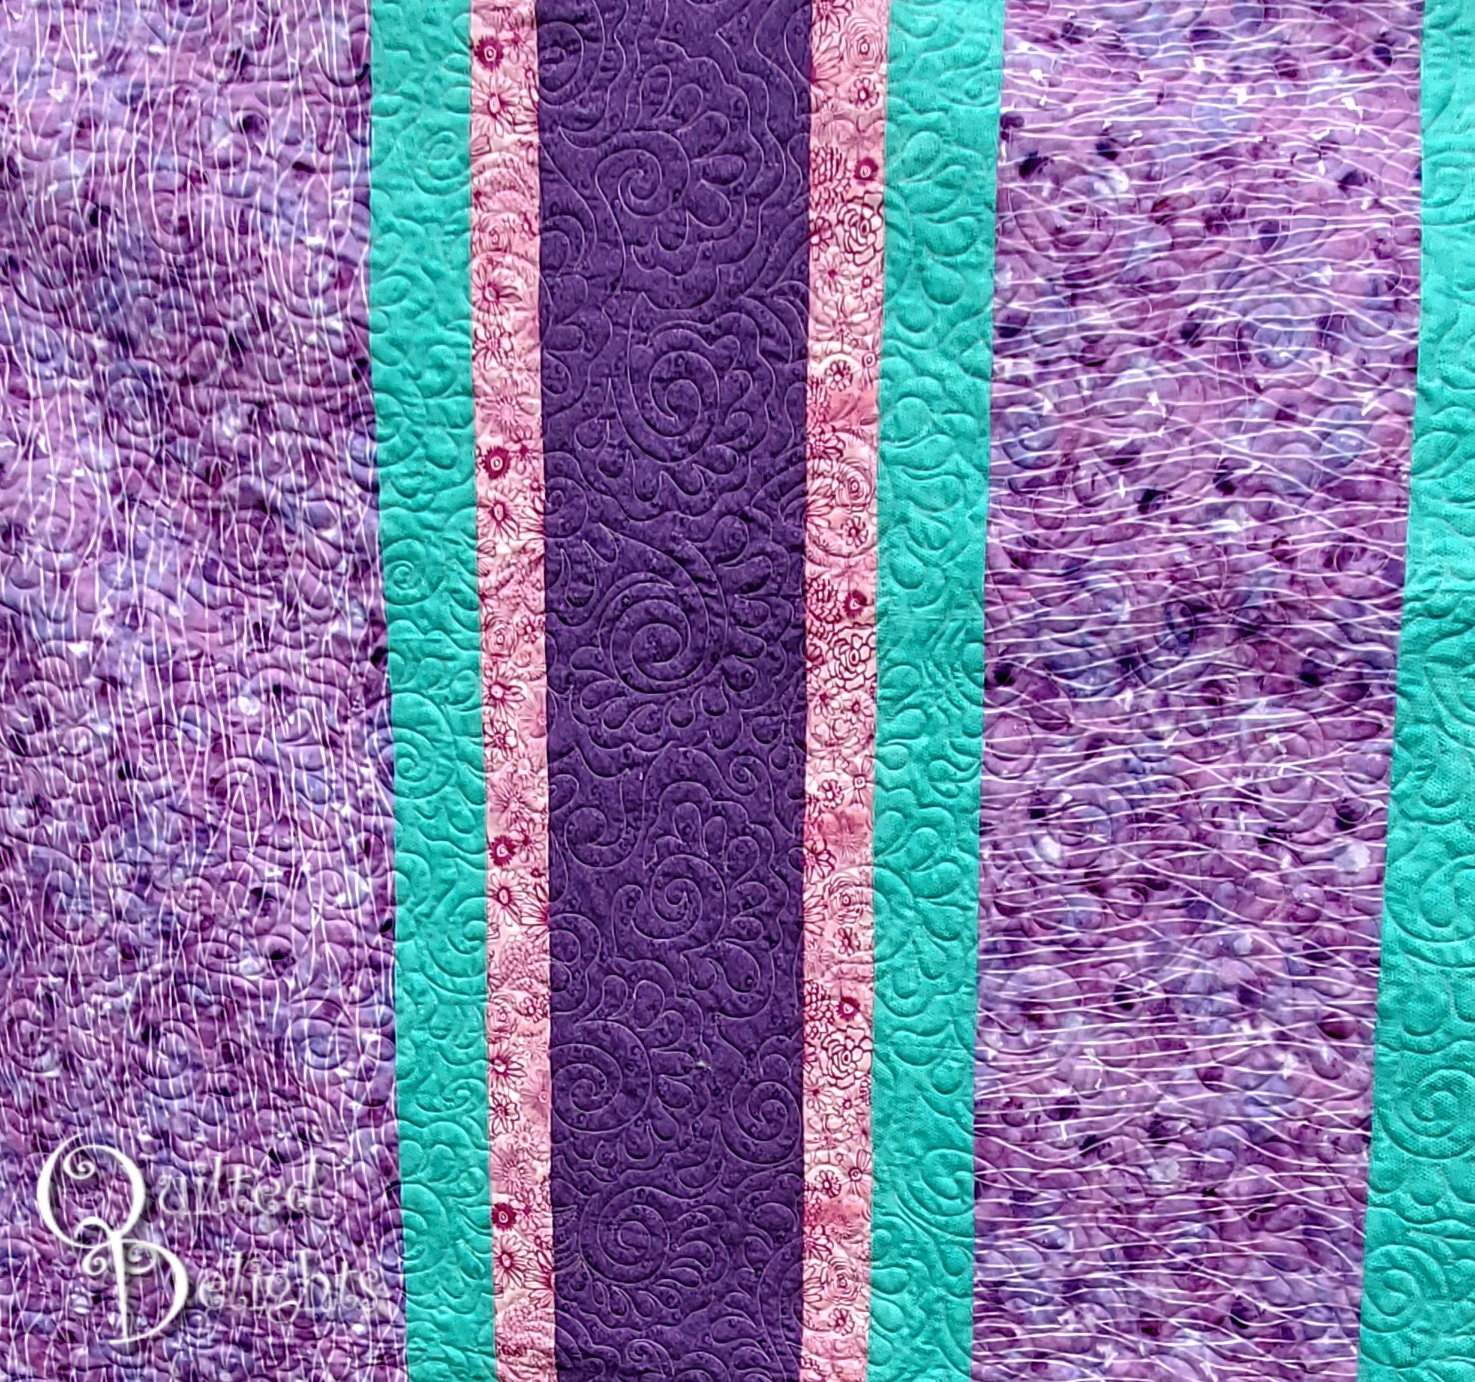
Something other than swirls this time around.


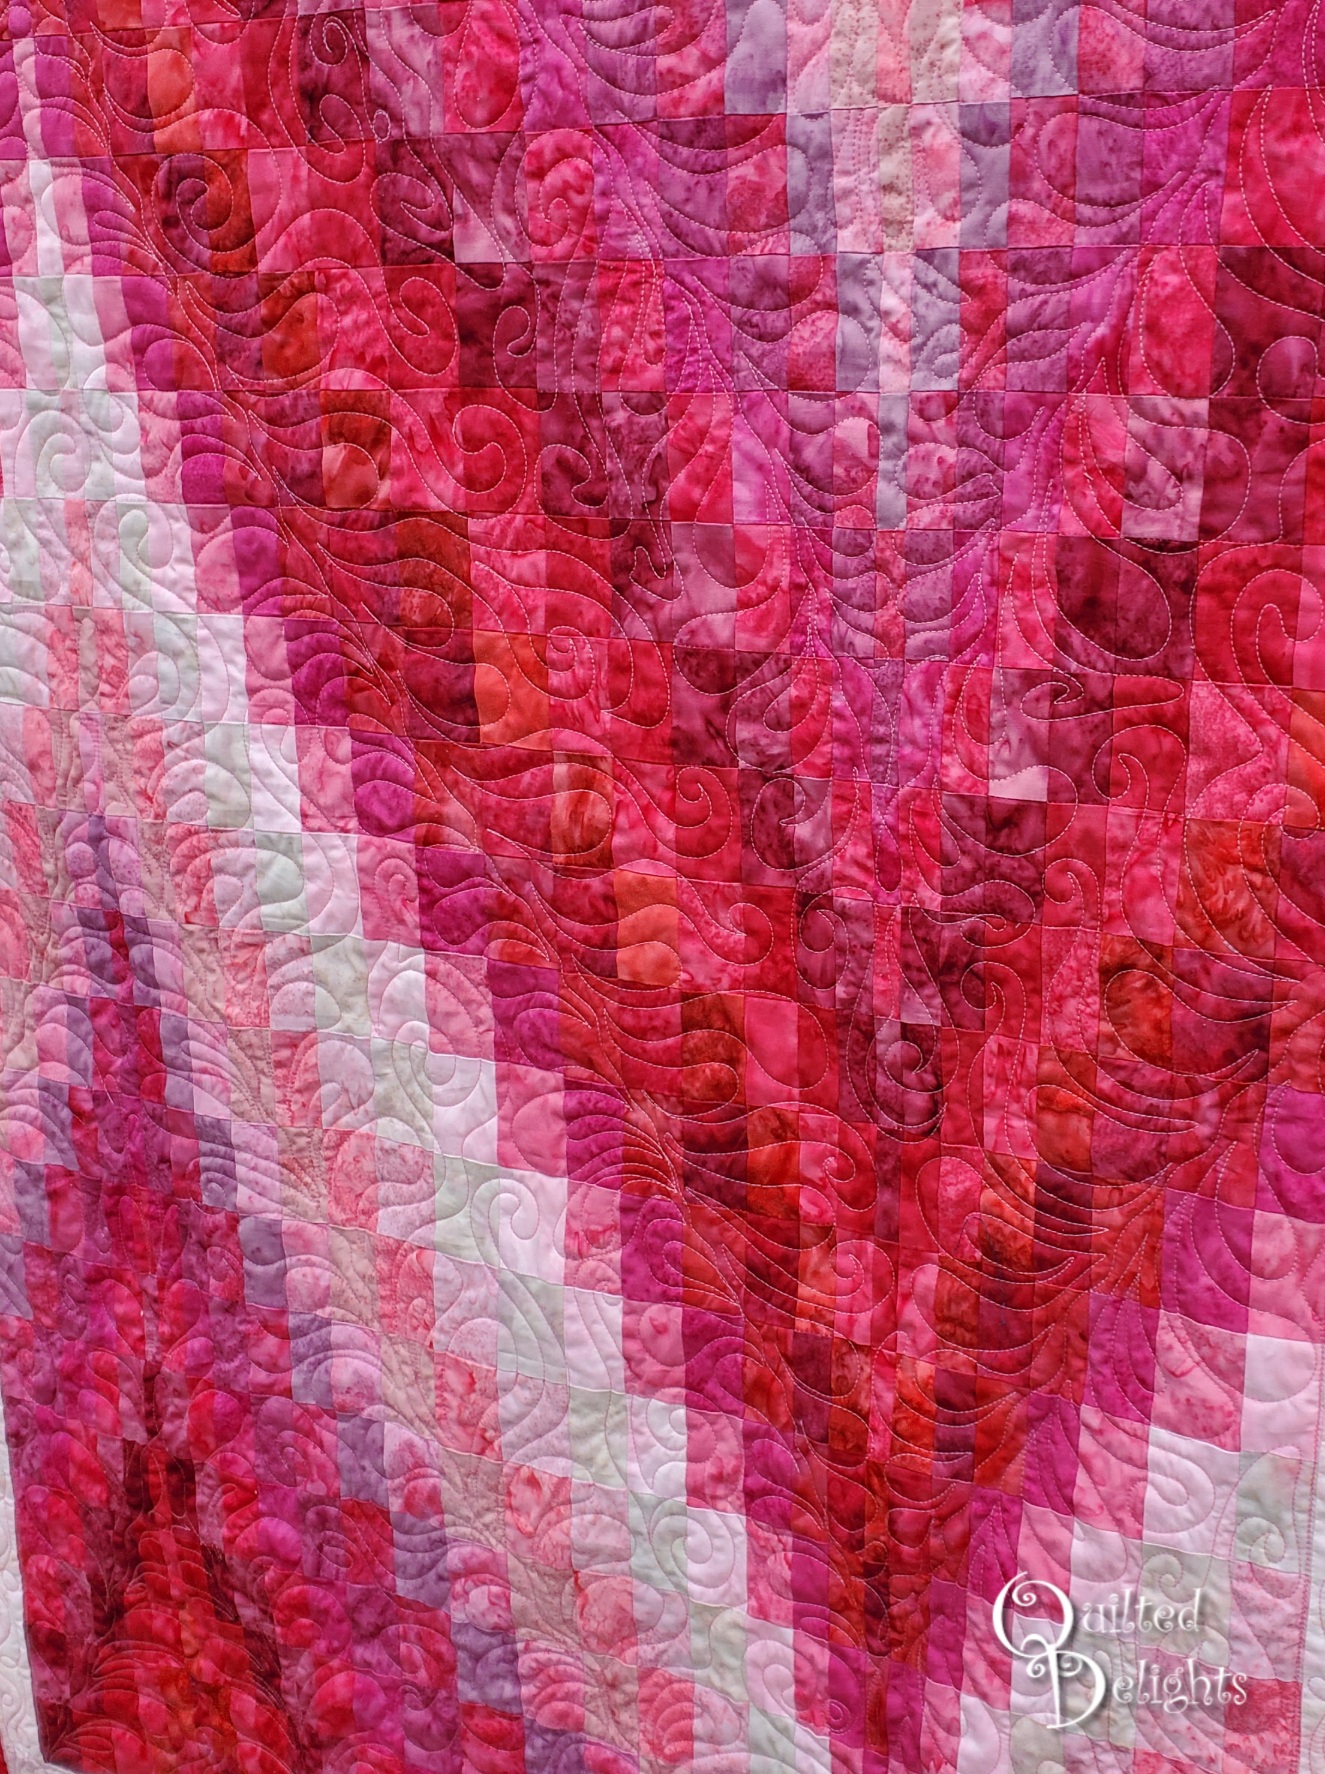
I played around with some feathers and swirls.  


I followed some of the pinks playing around with the needle drawing what ever felt fun.


So many pretty pinks!  I love this precut.  It's nice to have everything picked out and already cut for you.  Specially when its Project Quilting week!


Quilt measures 52 x 41.


Happy Quilting!


=^..^=


Sunday, January 15, 2023

Unicorn One Block Wonder - Finished


I finished this one a while ago but never got around to blogging about, so I am doing it now.  The top was finished June 2021 for the Fairy Tale Blog Hop.

I finished quilting it several months later in December, but never got a good picture of it. It's a big one so I needed two quilt holders, but my extra quilt holders were off at college.

When they got home in the spring I got some good pictures before I gifted it to my Sister, but then my phone broke and the pictures sat in the broken phone for a awhile and then slipped my mind.

I remembered them the other day and that I still needed to post the finished pictures so I sat down and got everything transferred off the broken phone.


I did an all over free hand swirly flower design for the quilting.  
The prints are so busy that custom quilting wouldn't really show up well.


I love how the panel melds into the hexagons! 


This quilt is a biggie. The panel was a full 36 inch panel and I used every hexagon. 


I even created a few extras hexagons by sewing two end scraps to make new triangles.


I had fun with all the different colored hexagons.


It was fun  designing the layout.


The backing used up more of my Stash. Again, this one was big so it has two strip sets in the back.


You can see the quilting a little better on the back.


This quilt now happily resides in Washington State.


Happy Quilting!


=^..^=


Thursday, December 15, 2022

Island Batik Lone Star Blog Hop


We are on Week Two of the Island Batik Ambassador Lone Star Blog Hop.


Today I am showing off the Heartland fabric collection by Kathy Engle 


Heartland is also one of the bundles Island Batik is giving away this week! 
I am also offering a small giveaway today. Details for both at the end of the post!


This collection has fun barns, chickens, fences,  chicken wire, and more all in red white and blue.  It definitely makes me think of the Heartland of America. Perfect prints for a patriotic quilt.

Mix in in the Lone Star pattern and this fabric really sings!


You can kind of say I created this quilt in rounds.
The first round was the Lone Star in the Center.  Made up of 8 diamonds.


The next round is 8 Lemoyne star blocks.  Since these ended up bein an odd finished size in the quilt, I decided to use templates and sew them up using the traditional way.  I even used Y seams.  Call me crazy, but I actually had a good time making these.  Every time the Y seam came out good I got all excited! 


I was super glad to have the the wool pressing mat provided by Prairie Spirit Alpacas. It came in handy for these blocks,  sew, press, sew press.  Everything came out smooth.


Round three is another set of 8 diamonds.  With these additions, the quilt top was now an octagon.


To make everything square I added Round four.   Four half Lemoyne Stars in each corner.


I had a piece of left over Hobbs Heirloom Premium Cotton Batting that was the perfect size.
Softness approved by Sheen, the Senior Quilt Inspector.


I used the Schmetz Chrome Microtex needles to piece and quilt it.  They fit perfect in both my regular machine and my long arm and work great with batiks.


I did some custom quilting on this little quilt.


I like to use the shapes to help guide where I am going.


I used some of the extra fabric pieces for the back. It is a fun way to show off the chicken fabric and some of the other pretty reds and blues.


Be sure to check out my fellow Island Batik ambassador Andi Stanfield of True Blue Quilts.   
She is also showing off her Lonestar today using the same Heartland fabric line.


Now for my giveaway!


I had some left over strips from this project and cut them up to create these little Island Batik Stash builder rolls.  Each one is similar to the regular Island Batik Stash builder rolls you can find at your local quilt shop.  They have four prints five inches x WOF.  To be entered to win them both, leave a comment below about Lone Star Quilts.  Have you ever made one?  Do you want to make one?  Or do you just appreciate looking at ones others have made?  I'll announce a winner here over the weekend.


**WINNER UPDATE**

Congratulations Tracey H.! The random number generator picked your comment! You won my little giveaway! I sent you an email.


**WINNER UPDATE**


Island Batik Giveaway!

You can also enter to win the Island Batik Giveaway.  They are giving away two fabric bundles.  One of Heartland and one of Emperor's Treasures.  You can use the Rafflecopter below to enter or visit their blog post HERE

This giveaway ends on December, 16th at 11:59 pm PDT. Two random winners will be notified by email on December, 17th and announced on the Island Batik Facebook page on December, 20th.


Happy Sewing!


=^..^=


Wednesday, December 7, 2022

Virtual Cookie Exchange Blog Hop


What a fun year it has been!  I've been able to play along with all the blog hops hosted by Carla, Carol, and Joan this year.  It has been so much fun and full of inspiration all year long and this month's hop hosted by Carol of Just Let Me Quilt is no exception!  Everyone in the hop has shown off some fun and fantastic treats so far, both of the fabric and eating variety and we still have one more day to go!


Today I am showing of a fabric treat.  I am calling this one Peppermint Cookies.  


The inspiration for this quilt actually came last year when I went to my Brother's house for Christmas.  He had his house decorated in red and white with a little bit of silver.  No green anywhere. It was pretty cool.  I noticed the only thing missing in his décor was a red and white Christmas quilt to drape over his white couch.  

I went home and looked up red and white quilts and came across a blog post by Barbara Brackman about red and white quilts.  You can see it HERE.  Halfway down the post is her version of this quilt and she even gave sizes.  Her snowballs were 12 inch blocks.  I wanted something smaller so I opened EQ8 and drew up blocks and sashing half that size. I also added some Square in a Square cornerstones and an inner border to finish up the stars on the edges. 


During the rest of December last year and throughout 2022 I snatched up some red and white prints. Some Christmassy and some just red and white.  I  ended up using 24 different prints for the snowball blocks.  The star points are more of a solid red without any white.  I contemplated using scrappy prints for these, but decided to go with one darker print to help bring everything together.


I even found the perfect fabric for the back.  Some red and silver ornaments.

I had the intention to make some white chocolate chip peppermint cookies to show off with this quilt, but alas, I feel more at home in the sewing room lately than in the kitchen, so that part didn't make for this hop,  But I can give you the base recipe for this Peppermint Cookie Quilt!


Yardage Needed:

Red: About Three Yards.  Can be a total of Scraps or one print for everything.
White:  About 2 3/4 yards.


Ingredients for a quilt that measures approximately 58 x 74 inches:

Use your favorite method to make each specific block,
or click for either a free Paper Piecing PDF or a Template PDF option for some of them. 


48 Snowball Blocks:  6.5 inch unfinished
Paper Piece PDF,   Template PDF

110 Rectangle Star Sashing:  6.5 x 2.5 inch unfinished
Paper Piece PDF,   Template PDF


28 White Rectangles:  6.5 x 2.5 inch unfinished 


32 Triangle in a square blocks:  2.5 inch unfinished
Paper Piece PDF  


31 Square in a Square blocks:  2.5 unfinished
Paper Piece PDF


32 Red Squares: 2.5 inch unfinished


4 White Squares: 2.5 unfinished


2 Border Strips: 2.5 inch x 70.5 unfinished
2 Border Strips: 2.5 inch x 58.5 unfinished.


Instructions:


  1. Layout the snowballs in a grid of 6 across and 8 down
  2. Fill in with rectangle star sashing.
  3. Add cornerstones from top to bottom, starting with a solid red squares and alternating with a Square in a Square block.  
  4. Use the White Rectangles, White Squares, and Triangles in a Square to make first inner border.  The Triangles in a Square blocks make the final outer star points. 
  5. Add the white outer borders:  Sew on the side borders and then the top.
  6. Quilt, Bind, Snuggle under and eat some real homemade peppermint cookies.


Be sure to check out the other blogs today. 

You are sure to see some great recipes and fun decorating ideas!

December 5


Happy Sewing!


=^..^=