Tuesday, January 10, 2012

Cutting More Shirts

I have another pile of shirts to work with today.  Last night I pulled the buttons off a few of them and cut the seams off.  I have 8 more shirts left to prep.  My daughter offered to clip the buttons off the other shirts last night but I told her she better get a good nights rest for her exams.
This afternoon I will take her up on her offer.


This morning I started cutting into the shirts I trimmed up last night.  I need 3.5 and 4.5 inch squares to make a couple more quilts for my hubby's Aunt.


=^..^=

Saturday, January 7, 2012

Starry Eyed Quilt Top


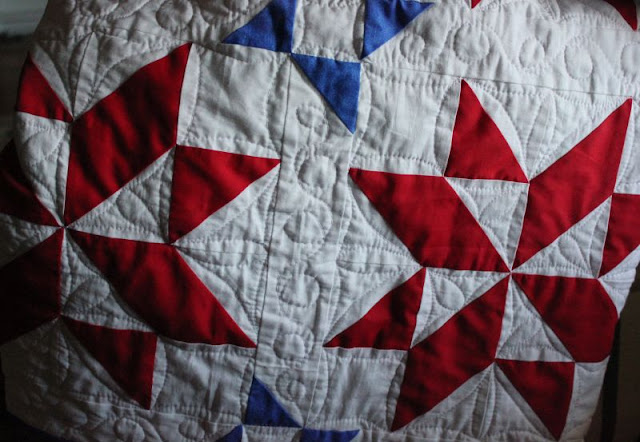
Here is the whole quilt top.  Each block is 16 inches so this is a nice sized quilt.  I wanted the sun shining on the quilt, but I spent too much time this morning and afternoon doing my much neglected house chores and the sun had gotten too high in the sky and the space I normally use for taking my quilts photos was in the shade.  So I asked my hubby to hold it up in the front yard for me where the sun was shining.
 

But I didn't realize how windy it was.  It kept making the quilt top wrap around him or flare out.


We ended up laying it in the grass.


While it was on the grass, my hubby said, "I like this one."  I actually had to have him repeat what he said because very seldom do our tastes in quilts align and I had to make sure he was talking about the quilt that was laying on the grass in front of us.  Then I told him it was a Christmas quilt and he said, "Really?"  so I had to show him all the Christmas prints.  He said he still liked it.  :)

I have to work on another top for someone else before I can progress with this one, but I should be able to baste both of them at the same time.  I will keep you posted.


=^..^=

Friday, January 6, 2012

I'm on a roll!

For my Starry Eyed quilt, each block only needed the outer row sewn on. I finished that up this evening and put the ones that would fit on my temporary design wall.  The others were on the ironing board, but they didn't stay there long.  I was excited to get this top done so I sewed all the blocks together!  I will take a picture of the whole top tomorrow when the sun comes up.


=^..^=

Thursday, January 5, 2012

2nd Finish of 2012

This is a my Le Petite project for December 2010.   It is a charm pattern from This and That quilt patterns by Sherri K. Falls and is called Butter Churn. 
It is now a finish and next Christmas I can lay it out on the table as a quilt instead of a flimsy.  


Funny thing is, when I first started the Le petite projects I was totally against buying precuts. Now, a year later, I LOVE precuts.  Oh how wonderful they are.  You get a wee bit of the whole fabric line and and all the fabrics play well together.  And if you can find them on sale you can get them for the same price as regular yardage.  I am definitely sold on precuts and my favorite patterns are the ones that use the entire precut with no scraps left over.  So far all the Schnibbles I have made seem to do just that.  


=^..^=


Wednesday, January 4, 2012

Diamond Star Finished

I finished the binding on my Diamond Star quilt last night. You can see the sun shining through the quilt on the right. I was going to take a picture in the morning, with the sun on the front of the quilt, but it was tooo cold. I am not use to 20 degree weather.  So I waited for things to warm up late this afternoon.


This was one of my oldest UFO's.  When moving things around to fit the Christmas tree in the front room, I found a notebook that listed some of my projects start dates and goals.  This quilt was on the list as being started in April of 2002.  I originally started it as a birthday gift, but it wasn't done in time, so it got put on the back burner as other projects took precedence. I think I will wrap it up now so it won't be late this year.  :)


I will have another finish tomorrow, I did some quilting today and just have a few more binding stitches left on one of my small table toppers.  So far 2012 is off to a good start.


=^..^=


Monday, January 2, 2012

Finishes in 2011


I orginally wanted to post this collage on Dec 31, but I decided to go out of town on the spur of the moment so my blogging schedule got a little out of whack, so here it is a few days late. 

 A year of finishes for 2011.


These are all the projects I made from start to finish.  7 of these were part of the Le Petite Challenge that ran from the fall of 2010 to the fall of 2011.   2 of my quilts won ribbons this year- a first for me and  I was super excited about that.

I am impressed with myself for accomplishing so much in 2011 and I plan to be just as productive for 2012.  I even have a jump start.  I just need to add the binding on the Diamond Star quilt that I quilted at Thanksgiving and I will have one finish in the bag.


=^..^=

Wednesday, December 28, 2011

The Beach in December

Even though I have a few more projects I want to finish up before the end of the year, there was no quilting done today. With temps in the 60's, it was a perfect evening in to play at the beach. I drove down with the kids to pick up my dogs and decided to stay longer and check out the surf before heading home.  The water was cold, and I needed a jacket, but the kids had no trouble playing around on the shore.    

Sunday, December 25, 2011

Merry Christmas


I made a couple other goodies this year for others.  The first I want to show off are these cute little candy sleighs.  I made some for my nieces and nephews and school teachers.  I saw these on the blog Ellyn's Place and just had to make some of my own.  They have a great tutorial there.  You can see it here.

Next I put together a circle Table Topper for my friend in TN. 


I had fun making this one.  It was my first ever circle quilt.  It is small 26 inches wide.  I used the the free pattern from Phillips Fiber Art that came on the back of the mini ten degree ruler I bought last month.


 I gave my sister and her hubby a basket of goodies that came with all the tools needed to make cake pops.  I also made her this spiffy apron to go with it so she could make them in festive style.  The apron pattern is a McCalls Pattern.  Working on the top neckline reminded me why I prefer making quilts instead of clothes, but I persevered and it turned out great.


Merry Christmas to you all!!


=^..^=

Saturday, December 24, 2011

Christmas Quilt

Merry Christmas Eve! 
My Christmas quilt has been delivered so now I can show it off. 

 I had these twelve blocks finished for some time, but never put them together.  I had the ideas a few years to turn them into three Christmas table runners, but then a better idea came to mind.  When I asked my mom what she wanted for Christmas all she wanted was a hug.  At first I told her I didn't know how to wrap a hug.  But then I figured if I put all these blocks together into a quilt she could wrap herself up in hugs from me all the time.   The idea came to me about two weeks before Christmas so I got busy sewing.

   This will be the first year I am not home for Christmas Eve.  I will be at the in-laws. So when she is missing me on Chrsitmas Eve she can wrap up in this Christmas Quilt and get a hug from me.  :)


=^..^=


Tuesday, December 20, 2011

FQSQA #5 and #6

I played a little catch up on my Fat Quarter Star Quilt Along last night.
I was really only one block behind, but since the new block comes out today, this morning I would have been two blocks behind.  Now I am right on track.


#5


#6

Now I am off to check out the pattern for block #7.


=^..^=

Sunday, December 18, 2011

My First FNSI


A lot of the blogs I follow participate in Friday Night Sew In.  It is fun to watch all the new posts pop up on Saturday that show what everyone accomplished that Friday night.  This time I decided to participate and added my name to the roster.  My post is a day behind though since I spent most of Saturday with the family.
The project I worked on is a surprise for someone, so you just get a small preview.  I got a lot of progress done on it though, half the quilting is now finished.

You can check out all the other Bloggers and see what they did for FNSI here.


Handmade by Heidi

Friday, December 16, 2011

Melting Edible Snowmen


I saw oreo truffle snowmen on Laughs and Crafts 4 Mom and just had to make my own.  She posted a great tutorial on how to make them.  It was perfect timing too, because I had just been invited to my friend's house for a night of roasting hot dogs and marshmallows by the fire.  These roasting snowmen seemed to fit the theme for the night and they were a big hit.

I copied the layout from Laughs and Crafts 4 Mom almost exactly, but I ended up adding a few more snowmen since I knew there were going to be a lot of people around the fire who might enjoy munching on snowmen.  While I was making them I did have trouble with one head and smeared the black food coloring around, but I guess you could say he has soot from the fire on his head.

These were really fun to make and I still chuckle when I look at the photo.  


=^..^=

Thursday, December 15, 2011

Christmas Quilt

I may actually get this quilt done by Christmas if I can get the cats off it.

I basted some other projects tonight too, but those need to be kept secret just a little bit longer.


=^..^=

Wednesday, December 14, 2011

Attic Window Block Tutorial

I write the newsletter for my guild and the chairperson over the BOM asked me to put instructions in the newsletter on how to do set in seams.  So I decided to use my own photos and do a mini tutorial for the newsletter.  Then I thought it would be good for everyone to have access to larger photos if they need them, so I am putting it here on my blog as well.

The theme for the guild's January 2012 Block of the Month is Attic Windows.  There are only a few requirements we must follow this month.  We have to have a winter scene in the center, a light blue fabric on the left, and a dark blue fabric on the bottom.   Below is my version for the January BOM.


Hello fellow Swamp Fox Quilters and anyone else who is reading along today.  :)
First pick out your favorite winter scene and two blue fabrics.  One light and one dark.
Fussy Cut a 7.5 inch sqaure from your Winter Scene fabric
Cut one 2.5 in x 10 inch dark blue strip
Cute one 2.5 in x 10 inch light blue strip

To help remember which strip goes where, layout the strips next to the 7.5 inch square with the light blue on the left and the dark blue on the bottom


Place the light blue strip and the winter scenes right sides together.
Place a mark on the blue strip 1/4 in above the bottom of the winter scene.
Sew to that line.


Fold the light blue strip out of the way.


Line up the dark blue strip on the bottom of your winter scene.
Place a mark on the dark blue strip 1/4 inch in from the left edge of the winter scene.
Sew to that line.


After you have sewn both sides, fold the block in half diagonally making sure the blue fabrics line up with each other. Using a long enough ruler, line up the diagonal edge and extend it over the blue strips.
Mark a line on the blue fabric.  I flipped the block over so I could mark on the light blue fabric since it was easier to see.

Sew on that line.


Trim off the excess.


To avoid bulky seams, press the seams in opposite directions from each other and flare out the center where all three fabrics come together.  Press.


You should end up with a 9.5 inch attic window block.

And if you don't win the all the blocks from the BOM you can make 11 more and have enough to make a small quilt of your own.  :)


=^..^=

Wednesday, December 7, 2011

Fabric Christmas Ornament

Tonight I am teaching the girls at church to make fabric Ornaments.
I only have an hour to teach them so I made up little kits for them to help save on time.
 I bought one yard of light blue snowflake fabric which was enough main fabric for 9 ornaments. 
The white and the dark blue came from my stash. I ran out of white though so I cut up some red and green fabrics for the last three sets.

I made a sample out of the green and red for the girls to see,
but I can't wait to see how the blue and white ones will turn out.

I used the tutorial from Crafter Without a Cat.


=^..^=