Thursday, February 6, 2014

She Who Sews Blog Hop


Today is the last day of the "She Who Sews" blog hop,  hosted by hosted by Carla of Creatin in The Sticks and Mdm Samm of Sew We Quilt.  All the previous projects have been wonderful and have definitely given me inspiration on how to use up the rest of my fabric.    

I am excited to show off my creations and I am going to start from largest to smallest.
First up is a new wall hanging for my sewing room. 
I call this one, "Just the Ladies"

My favorite lady is the the Hearts lady. I love her red hat and her green wings.
And her lips are the perfect shade of red.

 Second in the line up is my new wall organizer.

It will hold my smaller rulers and current (or next in line) patterns that I am working on.

The pattern is called Four-Pocket Organizer and was originally in the February 2011 Quilter's World magazine, but I bought the digital pattern from Annie's E-Pattern Central.


 Next up is a Mug Bag. Complete with built in mug rug.
I fell in love with this bag as soon as I saw it.  It is a free pattern from www.Red-Brolly.com  

The bag is meant to safely carry your special tea or coffee mug to your friend's house and back.
When you open it there is a pocket for your coffee and tea bags and a place to set your mug while you are drinking, but since I am not a coffee drinker I turned it into a small sewing bag.  Right now I have my yo yo makers in it.
It is perfect to carry around for road trips and doctors offices.

Here it is opened up. In the background is project number 4.   

It is little zippered sewing pouch.  You can never have too many pouches.  ;)


This one measures about 5 inches. Maybe a wee bit bigger with the binding.


 Now we come to the smallest project in the line up.  A needle and thread carrier. 
 Sometimes I do bindings in the car and this tiny pouch is perfect for that.

 The tutorial didn't call for velcro, but when I was trimming the extra strings I wasn't paying attention and I cut off the thin cord that was suppose to hold the case shut. Instead of un-stitching it and putting the cord back in I added the iron on velcro.  Perfect fix.


I had a great time making all these little storage containers and my new wall hanging.
This is a fun fabric line to work with.


Yep, there are two Mug Bags.

Since I made the mug bag out of strips instead of fat quarters and was able to get two bags out of one strip, and was able to sew two bags at a time. One for me and one to Giveaway.  I'd love to share one of the Mug Bags with you. Just tell me where you are from when you leave a comment and I will put your name in a hat to win my extra Mug Bag. I will pick a winner sometime Monday February 10.

Thanks so much for stopping by and make sure you check out the other ladies who made projects for us today.


February 6th


=^..^=


Friday, January 31, 2014

Another Finish - Ric Rac

Since Wednesday was a snow day and I didn't have class, or any assignments for class, I spent the night finishing up Ric Rac.  This one has been basted for too long so it was time to get it finished. It is a small quilt., about 40 x 46 inches, so it was easy to quilt and bind in a couple hours.


We still have snow, which is even rarer than getting the snow.
Usually when snow comes it is gone within a couple hours.
Since the roads aren't too bad it is fun for it to still be here.

 I did some simple quilting on this one.  Trying to figure out what to quilt on it was the main hold up for this UFO.  I was trying to come up with some super fancy quilting for it, when I should have realized that sometimes meandering is just what is needed. Particularly if it is going to be a quilt that gets used a lot, which this one will.


This is my second finish for the 2014 Q1 Finish A-Long
and 4th finished quilt of the year.


I love all the icicles! They are so pretty with the sun shining on them.

 There wasn't much wind when I was taking pictures, so it was actually nice to be out.
My fingers didn't get cold while holding the camera.

 I sure love the "fluffiness" of our birds in the winter.


=^..^=


Thursday, January 30, 2014

Don't let the Door Stop You Blog Hop


Welcome to my day of the "Don't Let the Door Stop You" Blog Hop, hosted by
Carla of Creatin in The Sticks and Mdm Samm of Sew We Quilt.


   Say Hello to Mumford.  He is my newest feline companion.
He will hold the door open for my two real kitties as they head to the gentleman's lounge - aka the litter box.


 What a nice little fellow Mumford is with those pretty green eyes and those hand stitched facial features.
The patterned called for a cat nose button, but I didn't have one on hand so I drew a triangle where his nose should be and filled it in with some thick black thread.

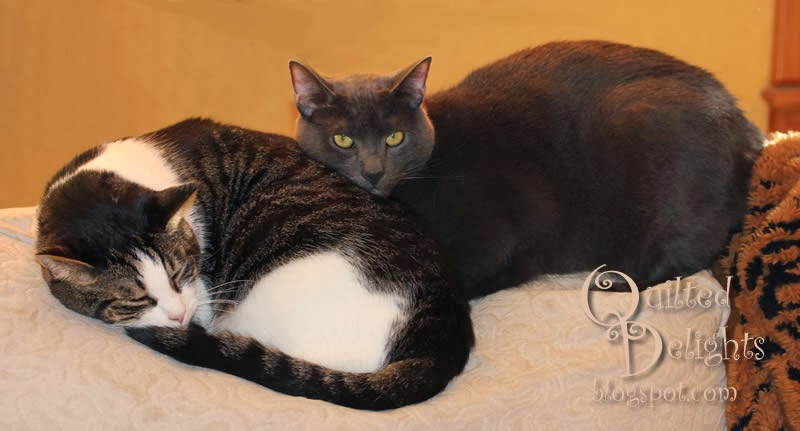
This is Jasper and Sheen, my two feline boys.
Very seldom are they this cuddly.


The pattern came from SewCutePatterns and is called Attack Cat.
It is a stuffed animal pattern, but can easily be converted to a door stop by adding some
heavy "stuffing" in his body section.  I'm partial to poly pellets.


Mumford was easy to put together and looks fabulous.
Here he is with the flash, giving us a better view of his shifting "fur" colors.


Be sure to check out the other great door stop hoppers today.
Clicking on their sites below


=^..^=

Wednesday, January 29, 2014

A Finish Just in Time For Snow


We have snow and ice!  Very seldom do we ever get snow and when we do everything shuts down.
They canceled school yesterday in anticipation of snow.
We could have had a perfectly good half day if we wanted to.
but to be on the safe side they closed everything.

Freezing rain started last night around 5 o'clock yesterday.
I went out to take a few pictures and then enjoyed the rest of the evening in my
sewing room working on my Christmas pinwheel quilt.


I finished the quilting and binding this morning and the dogs and I went out to do a photo shoot in the snow.

Belle likes to eat the snow.

Dean was a happy camper and running all over.


We even saw Roscoe, the neighborhood cat.


I never thought I'd have a quilt with snow in the background.  I'm so excited!
I love seeing quilts in the snow.


I wasn't going to put any quilting in the white part of the pinwheels but as I was about to add the binding I decided they needed a little something, so they all got some squiggles.


School was canceled again today ...

and tomorrow for good measure.

That includes my college class tonight.

I am ok with that.  :)


Notice the choice of foot wear for southern snow.


This is my third finished quilt of the year.
It is also my January finish for A Lovely Year of Finishes, - My goal setting photo can be found here.
It is also my first finish for Quarter One of the 2014 Finish A-Long.


=^..^=

Sunday, January 26, 2014

Project Quilting Challenge 2 - Upcycling


This is my entry for Challenge 2 of Project Quilting.  Rules for Challenge 2 Can be found here.
Basically the whole project had to made from materials that had a previous life as something else.
We also had to include two materials that were never intended for use in a quilt or clothing.
Again you didn't have to make a traditional quilt but you did have to have either patchwork, applique, or three layers stitched together.  I decided to go the non traditional route and I appliqued the front door on in order to stay within the guidelines.

I really struggled with this challenge. I am not one to up-cycle anything. I usually give away old clothes and unwanted items, so I was racking my brain trying to come up with an idea. Finally near the end of the week I had the pincushion idea pop into my head.

I have a bin full of old denim pieces that I cut from worn out jeans. I save them to use as patches when needed. I decided the denim would make great walls for a cute little house pincushion.

I added some fringe, beading, and yarn as vegetation. These items came from my daughter who had salvaged them from other items.

The two items I added that usually can't be found on a quilt are a bottle cap, and a CD. I put the bottle cap as a wall decoration. It reminds me of the quilt images that can bee seen on the side of barns. I used the CD to make the windows. I cut it into tiny squares and glued them on.

The door is an old piece of felt that had been tucked away in a drawer.

The roof is denim covered in a gold mesh. Another treasure from my daughters stash.

The pincushion measures 3 inches wide x 4 inches tall.
You can see all the other entries at the Project Quilting Flikr Group.


Can't wait to see what the next challenge theme is.
Hopefully I can come up with something more quilty next week.

=^..^=

Saturday, January 25, 2014

Celtic Solstice Step 2 Finished - FNSI results

I finished step two of The Celtic Solstice mystery.
I sewed last night and a wee bit this afternoon to get all 244 of these sections sewed together and pressed.


 I even cut up the orange and yellow for Step 3.


For the rest of the evening, I am going to spend time working on my entry for Project Quilting.  The challenge this week is upcyling.  I am very much out of my element for this theme, I had no clue what to make, but I finally came up with an idea the other day. Nothing to fancy but good enough to stay in the challenge this week.  I'll post pictures tomorrow before noon.


=^..^=

Friday, January 24, 2014

First FNSI of 2014

Tonight is the first Friday Night Sew In (FNSI) of 2014.  I have a birthday party to go to for the first part of the evening, but later on tonight I will be finishing up Step Two of the Celtic Solstice Mystery.  I have spent the past week quilting for some guild mates and tonight I want to piece.  So I decided to put these chevron blocks are on the agenda for FNSI.


=^..^=

Thursday, January 16, 2014

Wake Up to Kona Blog Hop

Today is my day for the Wake up to Kona Blog Hop and I am excited to show you what I created!

I started with this Classic Color Palate roll up and a bunch of Kona White and a wee bit of Kona Pacific.
I was inspired by the "Jelly Roll Strip Starburst" pattern by 
Kimberly Einmo.
I sewed the strips into groups of two and cut them on the 45 degree angle to get the diamond shapes.


The jelly roll gave me enough for 10 color coded stars plus four scrappy stars, I only ended up using two scrappy stars for my first project.


This is one of the bigger quilts I have made.  It measures 76 x 96 inches.

It needs a little more quilting in the white sections and the border and then it will be finished.
I am thinking about entering it as my challenge quilt for my quilt guild's annual show.
The theme is "A little Color in My Life".  But to do that I want to put some really spiffy quilting in the white space and that will take me awhile to finish up.

I am loving these pretty points!
I have really impressed myself with this one.
A little patience and a hot iron really pays off.  :)


After I was done cutting my star blocks I had a lot of these scraps leftover.  I am not one to throw away fabric so I came up with an idea.  It meant getting out the stitch ripper and the rotary cutter again but it was worth it.  The idea was to make a bunch of small pinwheel blocks and turn it into a small child's quilt that had pinwheels with wide sashing.
These are some of the scraps trimmed, grouped, and ready to be turned in to 3.5 inch pinwheels.

But then my husband gave me a better idea.  He looked at my design wall while I was in the middle of sewing together the first quilt and he said, "I really like these fancy pinwheel blocks.  You don't see these everyday."  When I told him those weren't the blocks I was making he didn't seem as excited. I told him they only looked that way because I was sewing the other half of a star block.  He really liked the pinwheels, so I got to thinking... 


Why not use the two left over scrappy stars and turn them into the fancy pinwheels you don't see everyday.
To spice it up even more I added all the tiny 3.5 inch pinwheels in the border and some more Kona White and TADA!  

I call this one "Floating Pinwheels".  It is 50 x 50 inches
I think I like it better than the first quilt and already want to make another one using the same color combo as the pinwheels that were on the design wall.

And as if that wasn't enough, 

I still had some scraps leftover so I decided to make a pouch.
The gray I used is Kona Pewter.

~~~


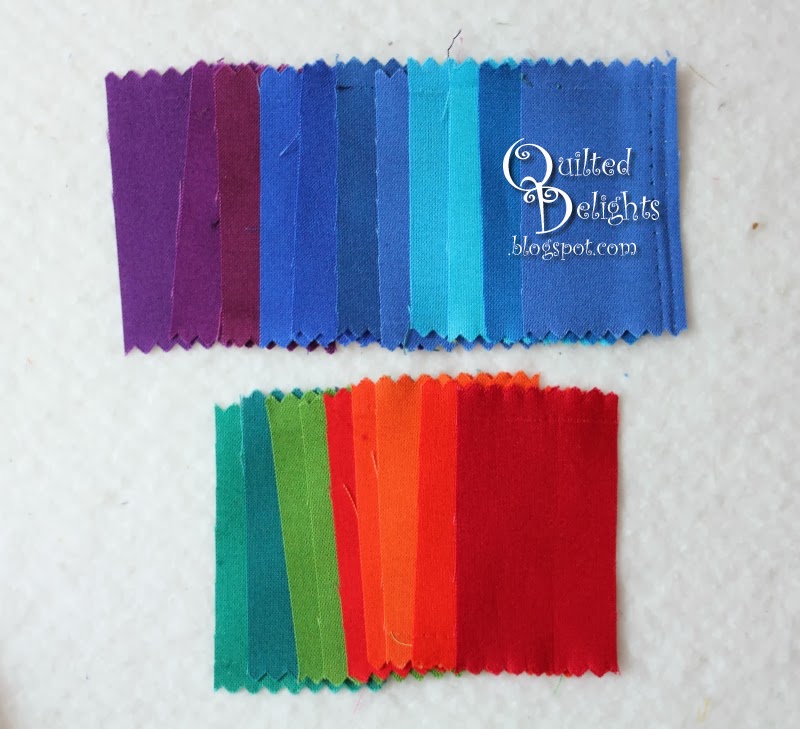
These twenty 1.5 x 2.5 inch scraps, plus one jelly strip (a brown that didn't seem to fit anywhere), are all that is left from that jelly roll.  I could probably chuck these, but you never know, I could find just the right project for them.


Make sure you go visit the other hoppers today.
They have some great Kona projects to share with you as well.