Wednesday, November 8, 2023

It's in the Bag Blog Hop!


Welcome! Today I'm showing off the Ultimate Travel Bag 2.0 for the "It's in the Bag!" Blog Hop.


For this hop, Island Batik Ambassadors were asked to pick a pattern from byAnnie.com and Annie generously sent the pattern along with all the extra items we needed to make the bag.

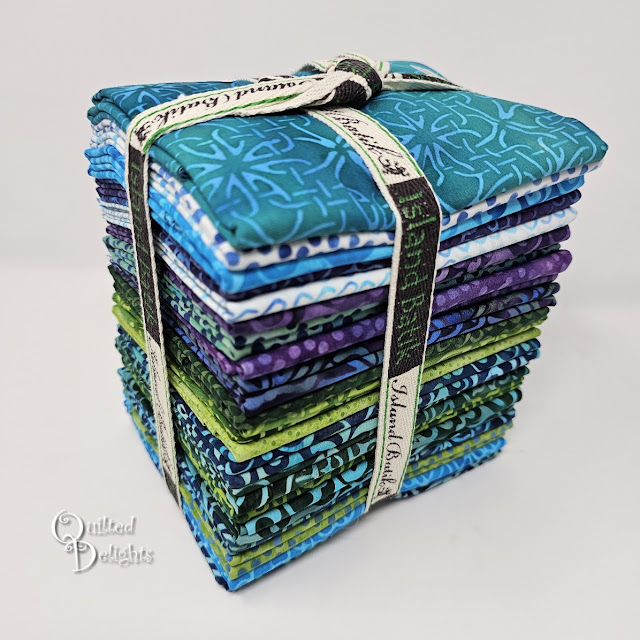
Fabric was provided by Island Batik from their newest fabric lines.  I used three prints from the Island Batik fabric line called Limerick, a signature line by Raija Salomaa of Quilters’ Treasure Chest. 

For the outside I used the purplish blueish Celtic knot print. To brighten up the inside, I choose the bright green Celtic knot print.  The dots in blue turned out to be perfect print for the coordinating handles and pockets.


You can find Limerick in these shops:

Lori's Country Cottage, AB  CANADA

Ocean Quilts, CA

Quilter's Dream, CO

Close To Home-Southington, CT

Jambearies Quilt Co, FL

Calico Cat,  HI

Red Roxy Quilt Co, IA

Treasured Quilting, IA

Hancocks of Paducah, KY

Laural's Fabrics and More, LLC,  MN

Quilt Haven On Main, MN

KC Maker Studio & Fabrics, MO

Cary Quilting Co, NC

Sierra Patchworks, NV

Creekside Quilts, OR

Quilter's Cove, OR

Connie's Collectibles, PA

Quilting Divas. WI

The Sewing Basket, WI

Falky's Treasures. WY

Lickety Stitch Quilts, WY

Sew Ewe Quilt Shop, WY


I had some helpers with this project right from the beginning.  Boonky had to test out the quality of the fabric before I cut into it,


While Carl was in charge of cutting accuracy.


Avi just wanted to play with the elastic.


I love byAnnie's patterns, they are very thorough with clear easy instructions and the labels provided in the pattern make it super easy to know what piece you need when putting everything together, particularly when there are a lot of pieces with similar sizes.


The Soft and Stable that goes inside the bag is fantastic.  It helps the bag stand up all on its own and as you can see above, creates nice soft bag parts for sleeping on.


For me, the most intimidating part of making the bag is the last few steps: attaching the front and back  to the side unit and adding the inside binding.  Mainly because there are so many layers to get through, including some with zippers, and I have to sew through it three times: once to attach everything, once to add the binding, and once to tack the binding down.

I took it slow as suggested in the Add on Video and to my surprise, it actually wasn't as stressful this time around compared to when I made my first By Annie bags.  Perhaps I knew what was coming and mentally braced myself, or perhaps I have just gotten better at the technique after doing it several times.  


It also helped that my Schmetz Microtex needle handled it like a champ.  I didn't even come close to breaking the needle.   


I took the bag down town Lake City for a photo shoot.


I wasn't sure which setting was my favorite, so I added them all. 


Downtown Lake City has several murals and some lovely decorated alley ways that lead from parking lots to Main Street.  Perfect for photo shoots.


The bag was fun to make from start to finish.


I will definitely be taking this one with me for our Thanksgiving trip.


There is plenty of room inside for a long weekend and I like the mesh pockets to help keep thing separated.


 The pattern gives instructions to use fabric for these inside pockets, but I like the stretchy see through mesh.


My neighbor has been enjoying the hop and has hinted that she needs a By Annie bag of her own. I will have to ask her which one is her favorite when the hop is over. 


Be sure to check out Emily of The Darling Dogwood and Maryellen of Mary Mack Made Mine to see what bags they made with this fabric line!


And last but not least,  Island Batik is giving away two fat quarter bundles and one of them is Limerick!  You can enter using the Rafflecopter below.  Visit the Island Batik blog post for more details.


Happy Sewing!


=^..^=


Friday, November 3, 2023

Jeweled Windows


As I was playing around with the small cathedral window blocks on my Halloween Pillows, I wondered what a quilt would look like if I used bigger blocks.


So I pulled out a older set of 5 inch charm squares from my personal Island Batik stash and decided to give it a try.  


I used the faux cathedral window method that shows different prints between the windows and laid out the background blocks first. When i was happy ewith the color placment I glue basted two folded black squares on top.


Aren't they pretty with black edges peaking out! 

I put them back on the design wall to make sure they got sewn together in the right order


 When I got them back on the wall I decided to make the quilt just a little bigger.

Adding more rows meant I needed more squares for the "windows" on top. I didn't have enough in my charm packs so I cut some bright squares from some left over 10 inch Island Batik squares and stash buster rolls.


If I ever make one this big again I'll cut window blocks slightly larger. The 5 inch charms barely fit under the folded black curves and most of them on the edges of the quilt by the border didn't get their edges covered up all the way.


I decided to roll back and sew the black edges down using my regular machine. I felt it would be easier to get super close to that black edge with the thread. I think next time I'll go ahead try it on the long arm and practice my precision skills.

This construction method of cathedral windows has raw edges on the back so they needs to be covered with a backing.

 I decided to go ahead and add some batting too for extra fluff, but I wasn't about to pin baste on the floor. I've done my fair share of that, so I used Hobbes fusible batting. It worked out great!

All the fabric layers and the batting make this a heavier quilt, which will be nice in the winter.


Look at that moon in the center of one of the windows. That was not planned, it was a happy coincidence!

I added some side borders after I sewed down all the black "curtains". The quilt back and batting were already attached so adding borders was similar to the quilt as you go method.  

I decided to trim the side backing and batting before adding the top and bottom borders, just to see how it was going to look. Well, that was a mistake...


I trimmed one side. Then out of habit, I rotated the quilt and put my rotary cutter in the fabric to trim the top.  I pressed down and made a hole all the way though then remembered I hadn't added the top and bottom borders yet! Ugh. Now there is a small hole in the back.  I'll probably applique something over it, but for now it's a hole.


I had a fun cat print in my stash for the back. 


The bright colors in the cats go perfect with all the colors on the front.


The quilt measures approximately 40 x 49.
Perfect for little ones or keeping legs warm.


Happy Sewing!


=^..^=


Saturday, October 28, 2023

Cathedral Pillow - Halloween Style


Check out these fun Halloween Pillows!


I made similar versions a few years ago for an Island Batik Ambassador project and gifted that set to my mom.  Since then I have been itching to make a set of my own.  


For my set I opted for some fun Halloween colors. I pulled out an Island Batik strip pack called October Twist and cut out two inch squares.


Traditional Cathedral Window quilts have only one fabric print for the windows. Everything else is solid. This version pops color out every where.  

I wanted all the orange prints to show up in the melons so they got put on the bottom and each of those prints got topped with two black squares folded on the diagonal.


This method does leave raw edges on the back though, so you'll need to cover those up.  My pillow back does that for this project this project.


I love the orange peaking through before the black fabric is peeled over.


The darker prints in the set went on the top for the windows and I glue basted them down.


Next step was to peeled back the black folds and machine stitch them down.
Avi, is taking his new job duties very serious, giving the stitching a close inspection. 


The Island Batik Spider Web fabric makes the perfect pillow back.


I am in love with these pillows.


Belle appears to like them as well.


And they match one of my older Halloween Quilts


And did you know there is a Pillow category in the SC State fair? I noticed it as I was looking through the categories this year and entered one the pillows. My first time entering a pillow and it won a blue ribbon! Wahoo!!


Happy Sewing!


=^..^=