Showing posts with label Small Projects. Show all posts

Wednesday, September 10, 2014

See You in September Blog Hop

My summer was mostly spent making memories with the family and playing in the lakes and waterfalls of South Carolina. We took several weekend trips and had one full week of camping fun.


As far as making things at the sewing machine, I spent a lot of time finishing up some UFO's, which I have been blogging about throughout the summer. I am always trying to whittle down my UFO pile but I always like to start new projects - probably why the UFO pile never gets smaller. Luckily this hop gave me incentive to start and FINISH three new projects this summer.


First on the list, I made another Ruffle tote with pockets.  The first one was made in March for the Ruffles blog hop and I made it to carry my drawing pad. When my Mom saw it, she told me if it was just a couple inches bigger it would be the perfect bag to carry her iPad around.
So I made another one this summer and made it a couple inches bigger just for her.
I also took some pictures as I made it and turned it into a pattern. It is my first attempt at making a pattern so I am offering it for free at Craftsy just for this blog hop. You can click the link at the top right on the blog or click here to go to Craftsy to get the pattern.


The bottom.


Here are both totes together.
You can see the new one is slightly taller, it is also an inch wider,
Perfect for iPads or any other tech pad.


For my next project I started out with this pile of lovelies.
This was my first time working with Riley Blake Gingham and I must say it is wonderful fabric to work with.  In the past I would avoid gingham in my projects because every other gingham I came across was flimsy, very light weight, and would cut all wonky.  Riley Blake is just the opposite.  It is soft and thick and wonderful to work with.  I will definitely be using Riley Blake's gingham the next time I need more for a project.


I turned some of that yummy goodness above into the quilt below.

I first saw this quilt block on Geta's blog. She calls it a modern dresden, but I like to call it Wagon Wheels or Steering Wheels because that is what I think of when I look at it. I've seen others call it windmills, dresden fans, and sunburst.  No matter the name, I love the block and when I first saw it, I put it on my quilt "to do" list.  It stayed there a long time though because I could never decide which fabrics to use.  During the summer I found out that gingham makes a wonderful Wagon Wheel quilt.  


When I was working on the layout of the blocks I split the quilt in two and put one of each color on the top and one on the bottom, but my son said if I move the red and yellow around every color would be opposite each other in the same way a knight moves on the chess board.  So I swapped the yellow and the red blocks and now each color can find its mate if it goes over two and down one or vise-verse.  I suppose I could also name the quilt "Knight's Movement".  So many names to choose from.


The quilt is 47 inches wide, just a few inches wider than most fabric, so I went for an easy pieced backing.


While cutting the strips for my Wagon Wheel quilt, each strip left me with two scrap dresden plates.  Just enough for one more mismatched block.  I decided to turn that into a pillow.  I finished it up with a band of dark blue gingham and stuffed it, leaving just enough room for it to squish up nice and soft when you hug it.


 My final project was a hedgehog coin purse.  When I first saw this on Craft Passion I knew I had to have one of my very own.  I think she turned out fantastic with her pink gingham quills.  

Thanks for stopping by to see my summer projects.
Be sure to check out the other hoppers today and see what they have been working on


To see the whole Schedule, wonderfully hosted by Shari and Mdm Samm, click here.


=^..^=


Wednesday, March 12, 2014

My Project for theRuffles Blog Hop

Today is Day 6 of the Ruffles blog hop, hosted by Mdm Samm of Sew We Quilt, and Amy of Sew Incredibly Crazy.  When I first heard about the Ruffle hop I knew it was the perfect motivation to make myself a new church bag.  I have been carrying around a plain black tote bag for about 12 years.  It was definitely time for a change. So I came up with this smaller prettier version.


I was able to go with a smaller bag since because the wonderful digital age has given me access to all my class manuals and scriptures right on my phone and that means less books to lug around. My only requirements for this bag was that it had to be big enough to carry my doodle pad and it had to have a front pocket for easy access to my keys, phone, and pens.  I also have room on the inside for my fancier pens that are in a small case.


Some of you may be wondering why I need a doodle pad at church, but in all honesty, it helps me pay attention.  I noticed no matter how hard I try to pay attention while staring at the people speaking, my mind wanders. I end up thinking about the height of the podium, or the flowers sitting next to it. Or I focus on what the speaker is wearing, wondering why their left sleeve is raised slightly higher then the right, or why the manufacturer choose a certain type of button over the other - small trivial things that take me away from the spiritual message being given.


Then one day when the kids were little, I was doodling with them during the meeting and I noticed I got more out of that session than I had in a long time. I tested my theory the next week and sure enough doodling helped me pay attention better in church, so I went out and bought me a pad and some pens and now I doodle in church and this Sunday I will have a cute fancy ruffled bag to bring with me.


Make sure you stop by the other blogs today and check out their ruffled creations.

March 12th 

Quilted Delights - (You are Here)


=^..^=


Monday, March 10, 2014

Project Quilting Challenge 5

The theme for challenge 5 of Project Quilting was: The Grocery Store.
We were suppose to find three things at the grocery store that inspired us to make a quilted project.  I'll admit this one stumped me.  Thursday night had rolled around and I still didn't have an idea.  I had been to the store and looked around, but nothing was inspiring me.

I did enjoy looking at all the colorful fruit in the produce section though, and finally decided I should go ahead and work with fruit. Apples in particular, since I had some apple fabric in my stash.  I contemplated layouts and designs and even asked friends for ideas, but I couldn't come up with something I liked, or something that I liked that I could put together in the next couple days.

I decided I better get off the apple idea and move onto something else.  Then I came up with a great idea to make a watermelon log cabin quilt.  I even played around with some layout ideas:

But as I started to cut out the light colored fabrics I realized I just wouldn't have enough time to complete a log cabin quilt in two days, even a small one.  I could probably get the top done if I stayed up late both nights, but I wouldn't be able to baste, quilt, and bind it before the Sunday deadline.  So I scrapped that idea as well.

Then I got to thinking about strawberries, one of my favorite fruits. They have been looking good on the shelf in the produce section lately and a couple weeks ago I printed out a strawberry iris folding pattern that would be perfect for some Strawberry themed fabric postcards.  I decided now was the perfect time to make them.
Since my last few daylight hours of the week were spent playing with relatives at the beach, I had to work on these four beauties Friday evening and during the wee hours of Saturday night/Sunday morning. I finished them in time to get a few hours of sleep before I post pictures and headed off to church.

I made four at a time because there are a few mailboxes I want these to land in during the next couple days. I am submitting a small project this week but hopefully inspiration will strike early next week and I can work on a bigger project for the last challenge of the year.

To check out all the other entries submitted this week and VOTE for your three favorites,
click HERE.  My strawberries are #19.  To vote click the heart in the upper right corner of the project you like the best.


=^..^=

Thursday, February 6, 2014

She Who Sews Blog Hop


Today is the last day of the "She Who Sews" blog hop,  hosted by hosted by Carla of Creatin in The Sticks and Mdm Samm of Sew We Quilt.  All the previous projects have been wonderful and have definitely given me inspiration on how to use up the rest of my fabric.    

I am excited to show off my creations and I am going to start from largest to smallest.
First up is a new wall hanging for my sewing room. 
I call this one, "Just the Ladies"

My favorite lady is the the Hearts lady. I love her red hat and her green wings.
And her lips are the perfect shade of red.

 Second in the line up is my new wall organizer.

It will hold my smaller rulers and current (or next in line) patterns that I am working on.

The pattern is called Four-Pocket Organizer and was originally in the February 2011 Quilter's World magazine, but I bought the digital pattern from Annie's E-Pattern Central.


 Next up is a Mug Bag. Complete with built in mug rug.
I fell in love with this bag as soon as I saw it.  It is a free pattern from www.Red-Brolly.com  

The bag is meant to safely carry your special tea or coffee mug to your friend's house and back.
When you open it there is a pocket for your coffee and tea bags and a place to set your mug while you are drinking, but since I am not a coffee drinker I turned it into a small sewing bag.  Right now I have my yo yo makers in it.
It is perfect to carry around for road trips and doctors offices.

Here it is opened up. In the background is project number 4.   

It is little zippered sewing pouch.  You can never have too many pouches.  ;)


This one measures about 5 inches. Maybe a wee bit bigger with the binding.


 Now we come to the smallest project in the line up.  A needle and thread carrier. 
 Sometimes I do bindings in the car and this tiny pouch is perfect for that.

 The tutorial didn't call for velcro, but when I was trimming the extra strings I wasn't paying attention and I cut off the thin cord that was suppose to hold the case shut. Instead of un-stitching it and putting the cord back in I added the iron on velcro.  Perfect fix.


I had a great time making all these little storage containers and my new wall hanging.
This is a fun fabric line to work with.


Yep, there are two Mug Bags.

Since I made the mug bag out of strips instead of fat quarters and was able to get two bags out of one strip, and was able to sew two bags at a time. One for me and one to Giveaway.  I'd love to share one of the Mug Bags with you. Just tell me where you are from when you leave a comment and I will put your name in a hat to win my extra Mug Bag. I will pick a winner sometime Monday February 10.

Thanks so much for stopping by and make sure you check out the other ladies who made projects for us today.


February 6th


=^..^=


Thursday, January 30, 2014

Don't let the Door Stop You Blog Hop


Welcome to my day of the "Don't Let the Door Stop You" Blog Hop, hosted by
Carla of Creatin in The Sticks and Mdm Samm of Sew We Quilt.


   Say Hello to Mumford.  He is my newest feline companion.
He will hold the door open for my two real kitties as they head to the gentleman's lounge - aka the litter box.


 What a nice little fellow Mumford is with those pretty green eyes and those hand stitched facial features.
The patterned called for a cat nose button, but I didn't have one on hand so I drew a triangle where his nose should be and filled it in with some thick black thread.

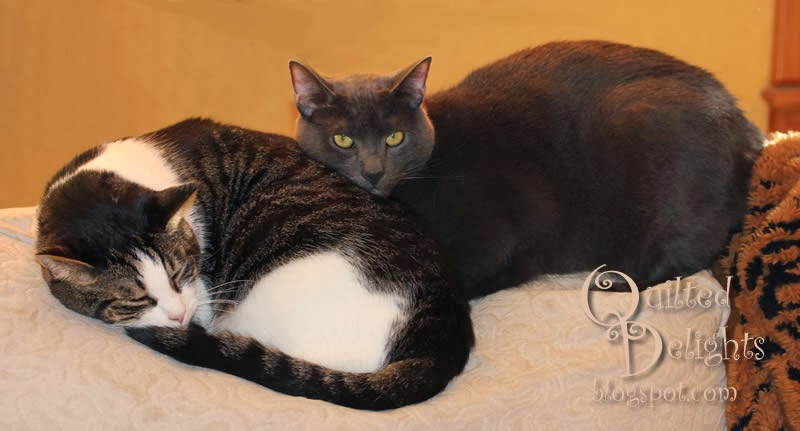
This is Jasper and Sheen, my two feline boys.
Very seldom are they this cuddly.


The pattern came from SewCutePatterns and is called Attack Cat.
It is a stuffed animal pattern, but can easily be converted to a door stop by adding some
heavy "stuffing" in his body section.  I'm partial to poly pellets.


Mumford was easy to put together and looks fabulous.
Here he is with the flash, giving us a better view of his shifting "fur" colors.


Be sure to check out the other great door stop hoppers today.
Clicking on their sites below


=^..^=

Wednesday, December 25, 2013

Pretty Pouches for Christmas Presents

Merry Christmas!
I can finally show off the little creations I made for my friends and family.

First up, two jewelry pouches.
I really like these jewelry pouches. Hopefully my two young friends in MN do as well.

I can't gift an empty pouch, so I added a couple necklaces and a pair of earrings for both of them. 


For my friend in TN, I made a pencil pouch. I used this free tutorial.


I like the look of scrappy batiks. I makes me think that this pouch is perfect for an artist.


 I even made the ends scrappy.


For the stitching on the top I used a heavy weight variegated thread. It think it helps add to the scrappiness.

I also sent her three ear bud pouches.  One for her and her two daughters.
I am very proud of these three.  They are the best ear bud pouches I have made.
The actually turned out as circles!  The other ones I have made turned out as wonky weird ovals.
They still ended up with a home though, my daughter is the savior of pouches gone bad.


And of course, some hand knitted dishcloths to give away.
Hope you all have a Merry Christmas and Happy Holidays!


=^..^=

Friday, March 15, 2013

More Spring Baskets

I showed my kids the first basket I made and they said they wanted some for their Easter baskets,
so I made three more.
I was picking out fabrics for the basket on the left when my oldest son came in the room to keep me company. He said he wanted to pick the fabrics for his basket so I let him.  His is in the middle.


My youngest son, who is 9, wanted all solid fabric for his.  I tried to convince him to use some patterned fabric for cuteness, but there was nothing I could have said or done that would have convince him to use anything other than solids.


I pulled out the colors he wanted and cut out the pattern.  He kept assuring me it would look fantastic and he was right.  It did turn out fantastic.  He says the solid one is the best out of all four.  :)


My middle son said he wanted one made in all browns. The darker the better.  I am still trying to convince him to go for more Easter colors. We shall see what happens...

=^..^=